Mods for Winter Living

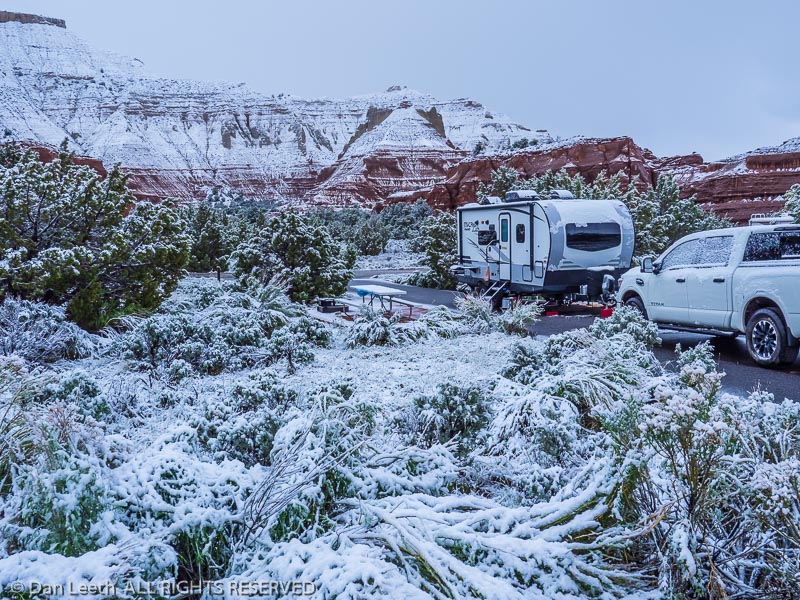
While our new home is being built here in Colorado, we’re staying in our trailer at a nearby RV park for the winter.

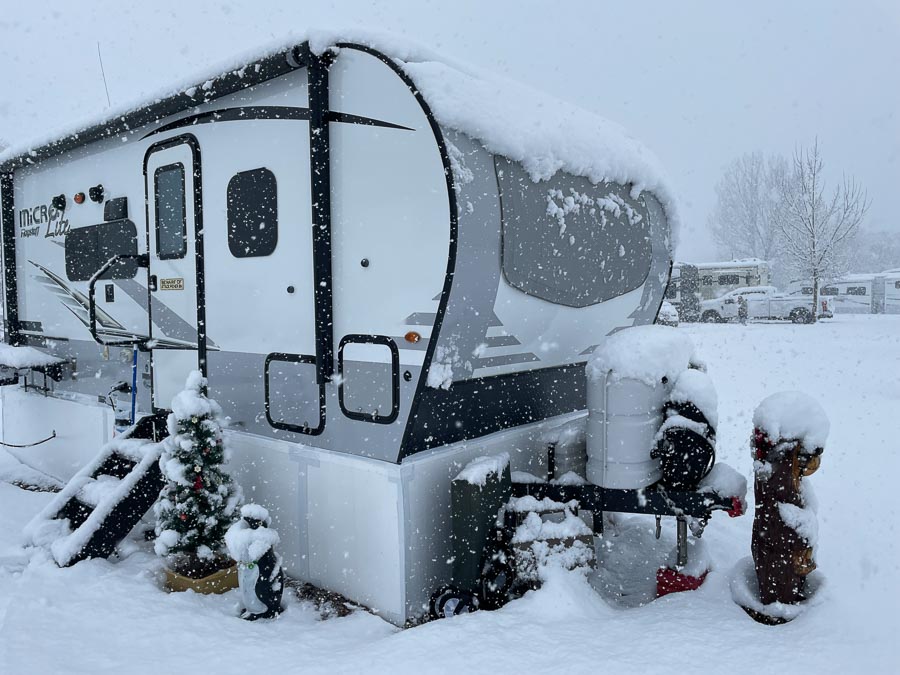
I’m not an expert, but here are a few things we’ve done to survive temperatures that are consistently in the teens or lower at night (Fahrenheit) and seldom reach the 40s in the daytime.

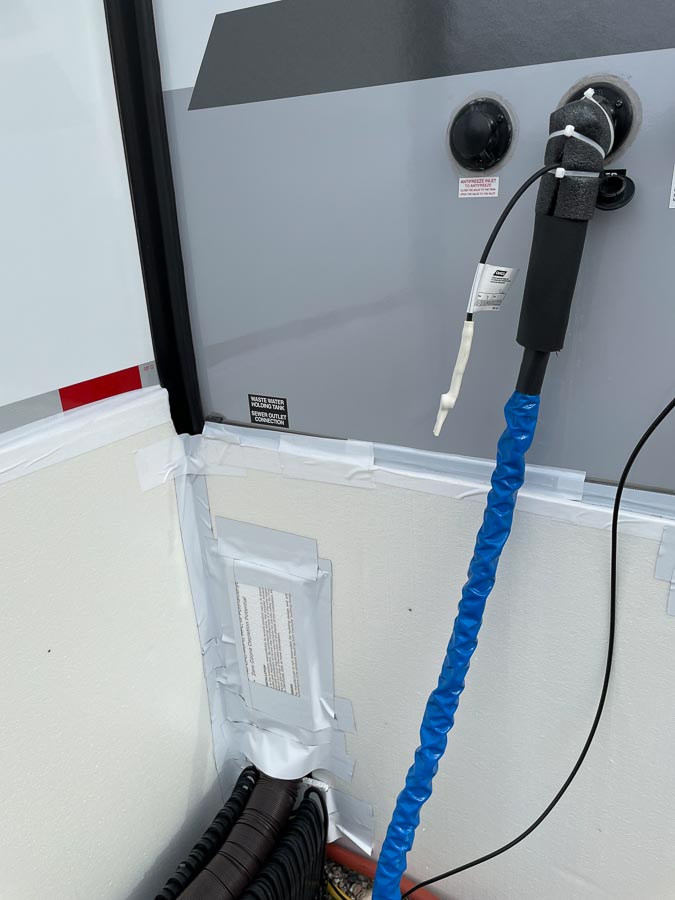
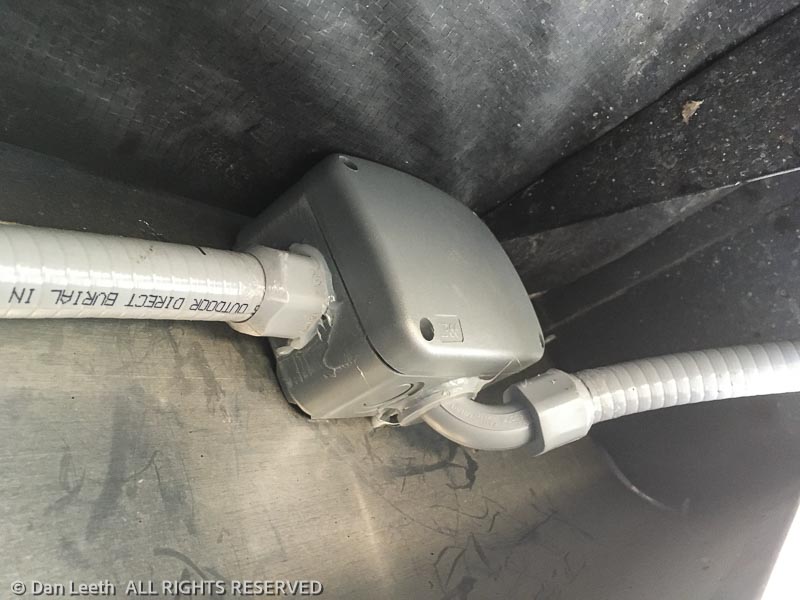
The first thing we did was buy a heated water hose. This one, made by Camco, has a temperature sensor and has not failed us yet.

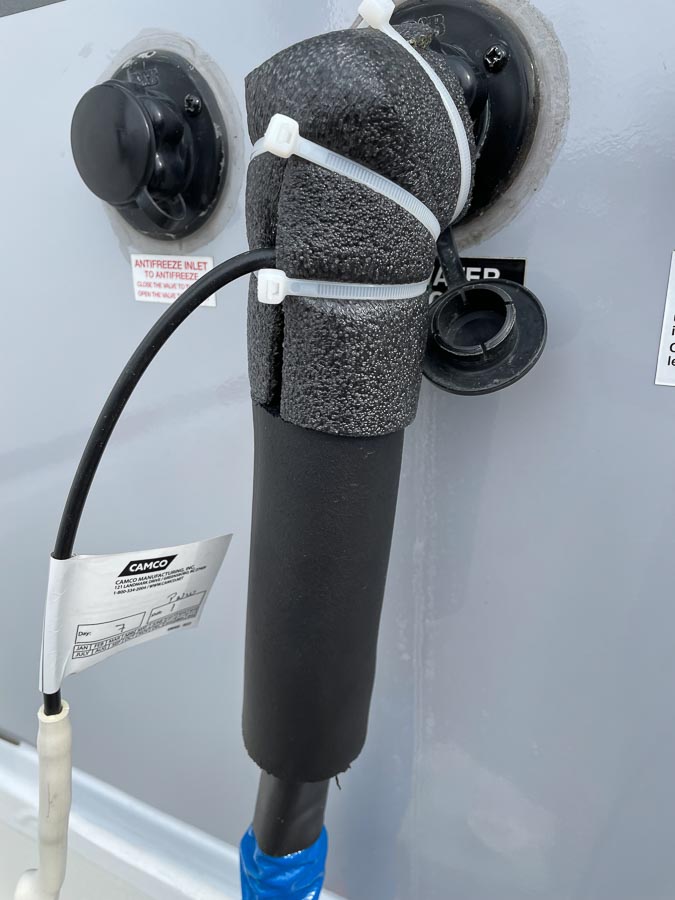
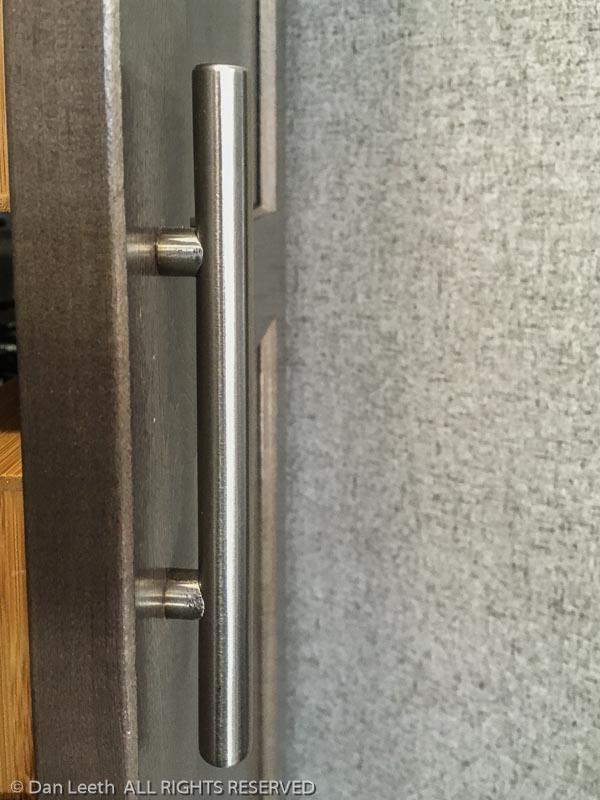
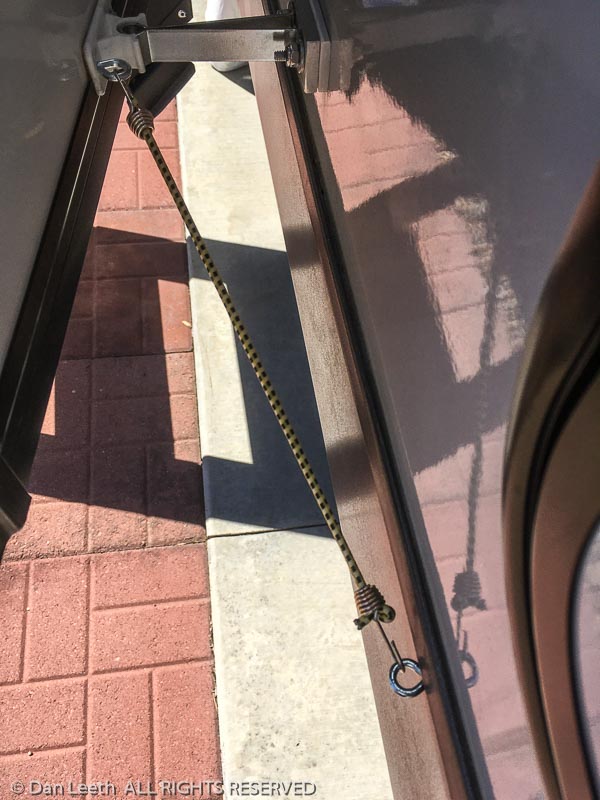
To insulate the connection into the trailer, I attached a 90-degree brass fitting onto the trailer input and covered it with a foam pipe insulating elbow, which I bought for a few dollars at Lowe’s.

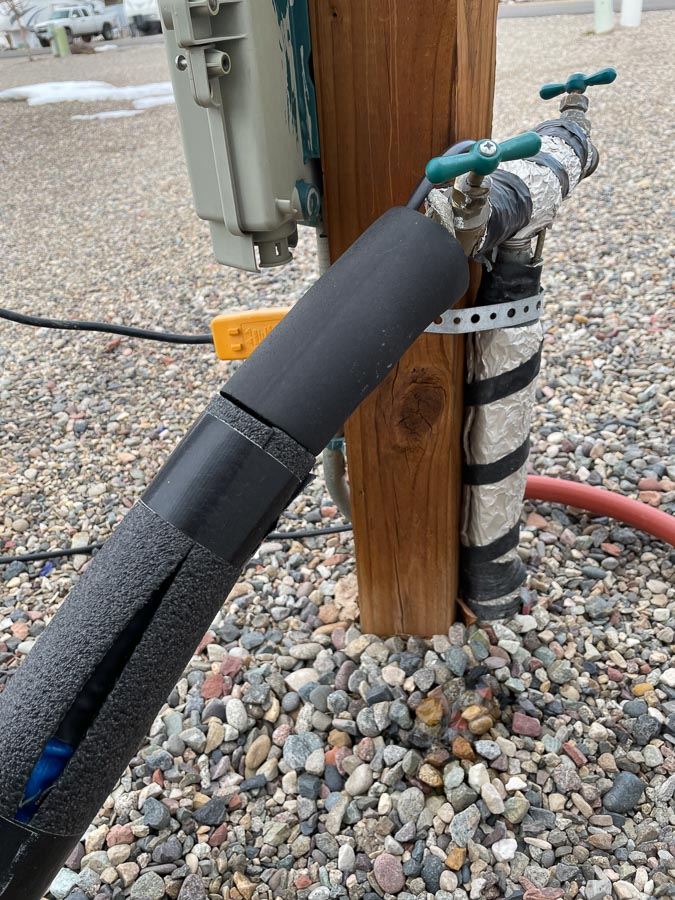
At the other end, I wrapped one-inch, pipe insulation from Lowe’s around the hose to help retain some of the heat and provide a bit more protection where it lies on the ground.

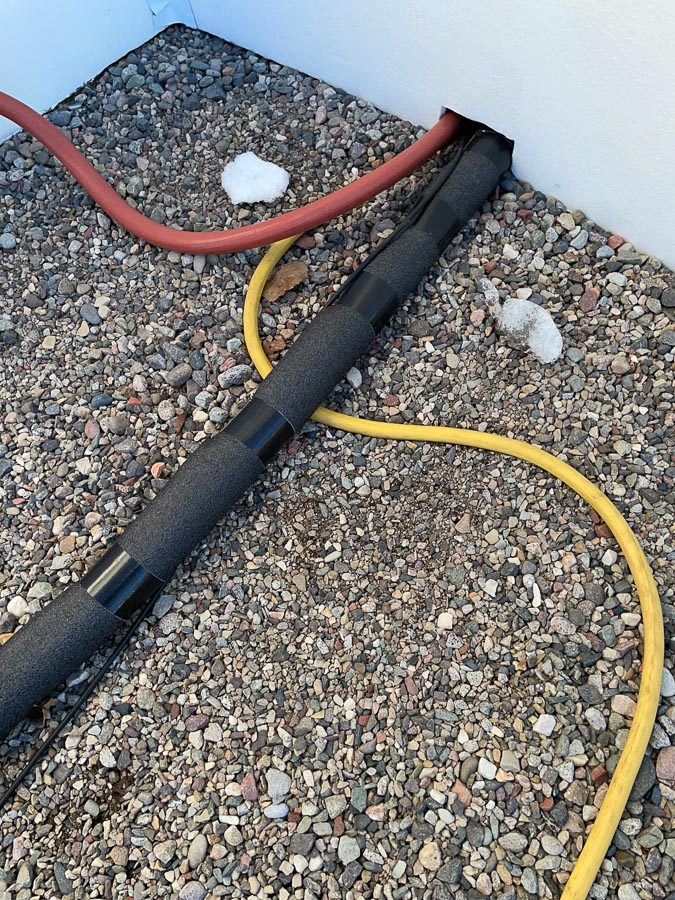
The pipe insulation doesn’t bend easily, so I only put it on the top 2/3 of the hose length.

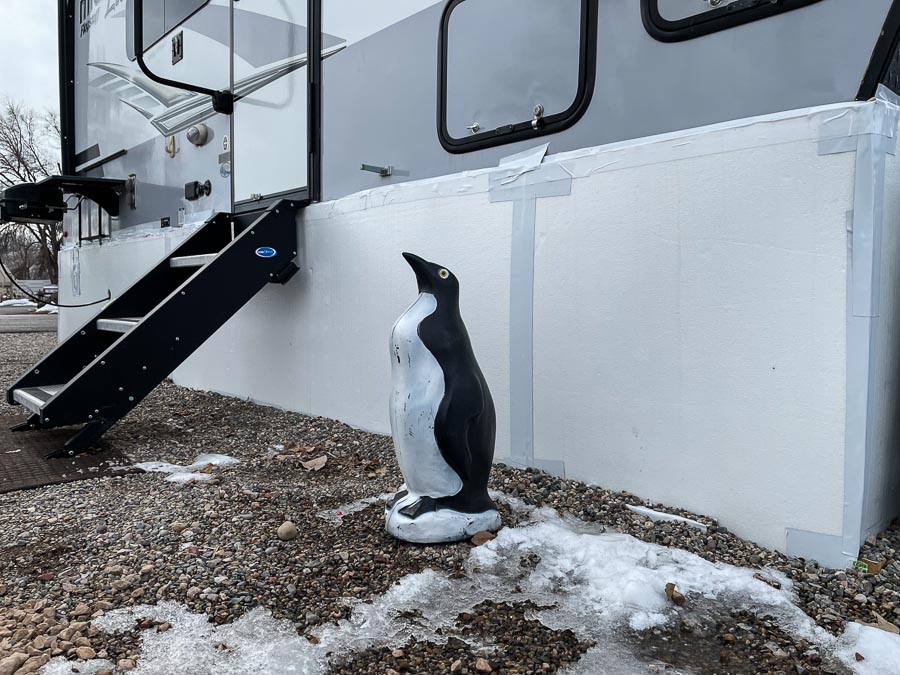
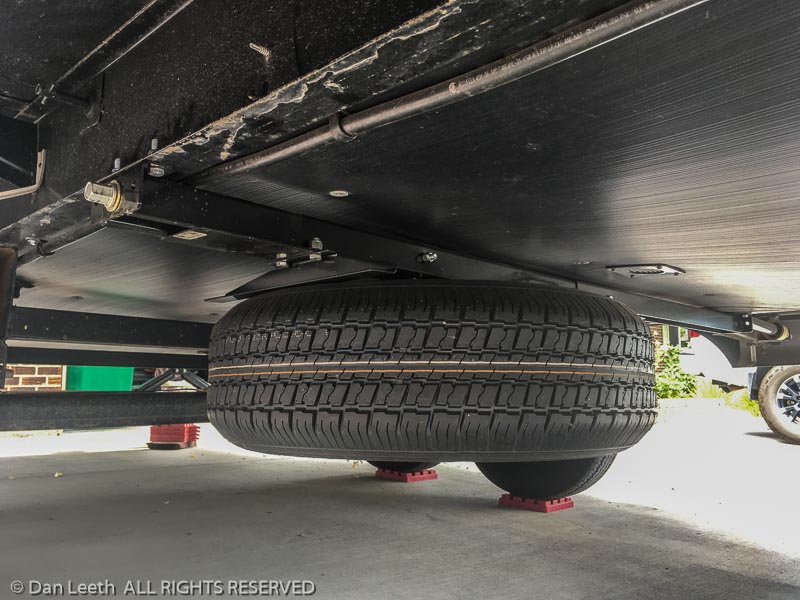
The second thing we did was put Styrofoam insulating panels around the trailer undercarriage. We went with ½-inch panels to begin with, but had to add a second layer of one-inch panels in places. The thinner panels did not hold up to high winds. They’re held together and to the trailer with white, three-inch Gorilla tape.

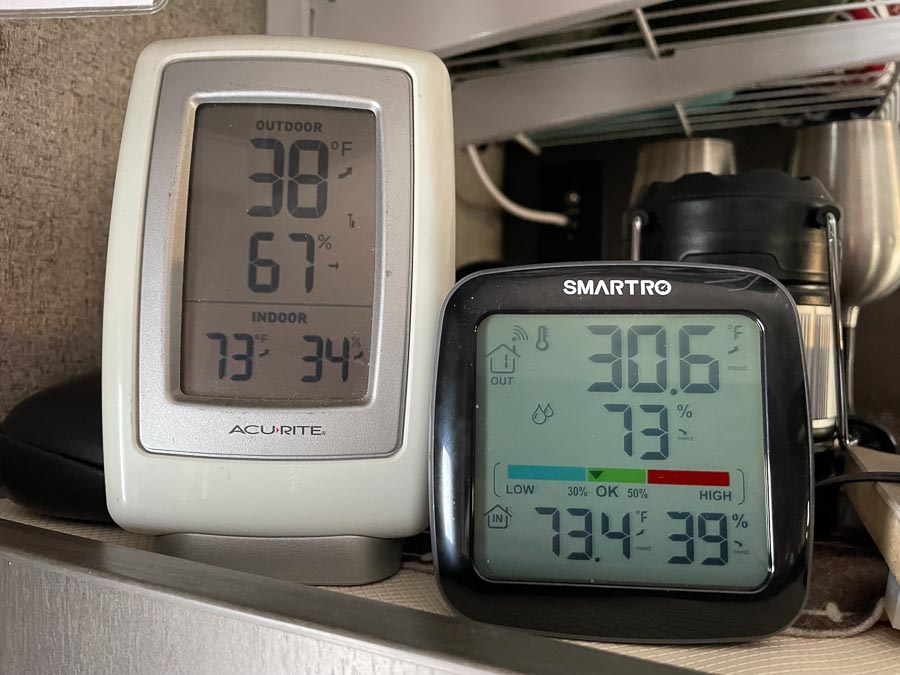
Temperatures in the insulated “crawl space” under the trailer (left thermometer) have been consistently eight to 10 degrees warmer than the outside temperature (right thermometer), seldom dropping below freezing. That means less heat loss through the floor and warmer temperatures on bare feet at night.

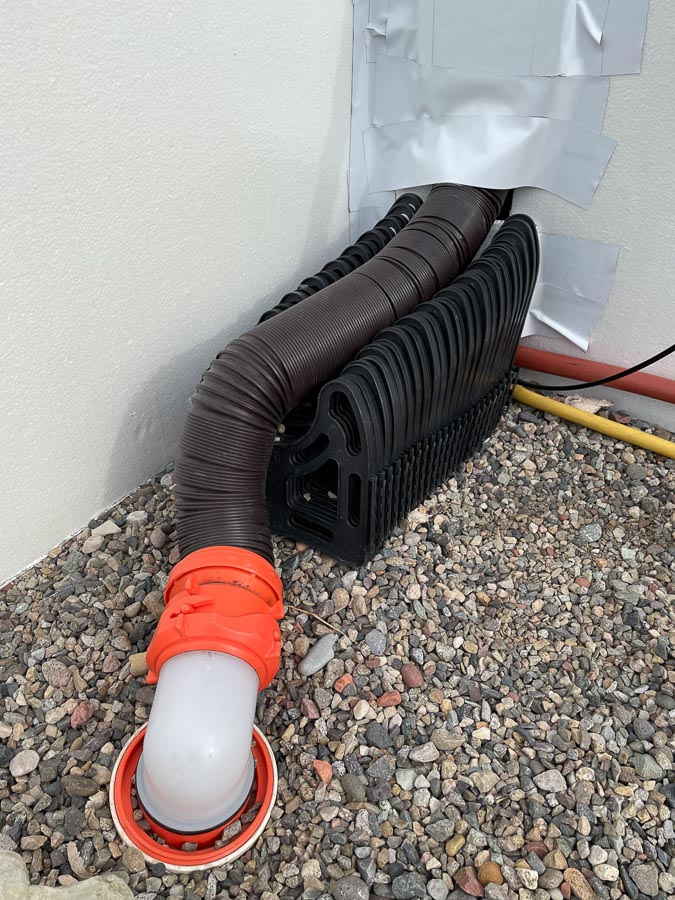
I noticed that others in the RV park who put up undercarriage panels did not leave a place to access the slice valves for their gray and black water tanks. Even though the experts say not to do so, my neighbors just left the valves open. We did the same. Our sewer hose is extremely short and has a steady drop. Whenever we flush or drain water, it goes straight to the sewer. It’s worked perfectly for us, with no icing up and no poopsicles yet, but this is Colorado, not Minnesota.

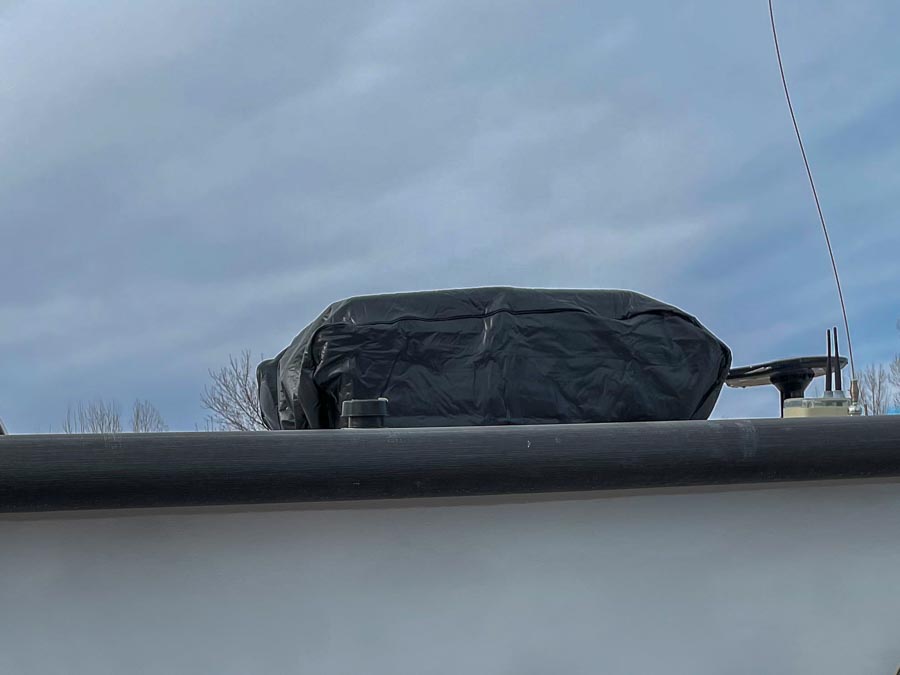
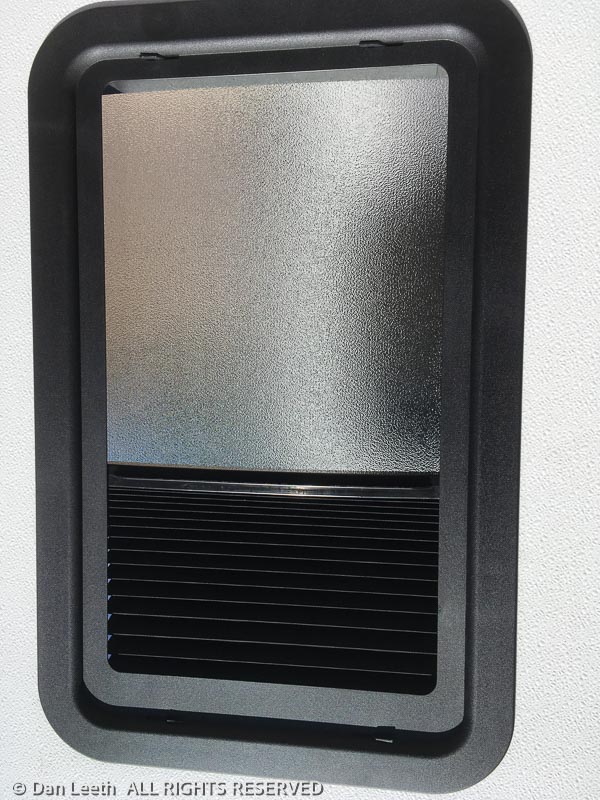
To keep warm air from escaping up through the air conditioner, a neighbor insisted we should put a cover on the AC unit. I’m not sure it helps, but it doesn’t hurt and didn’t cost much.

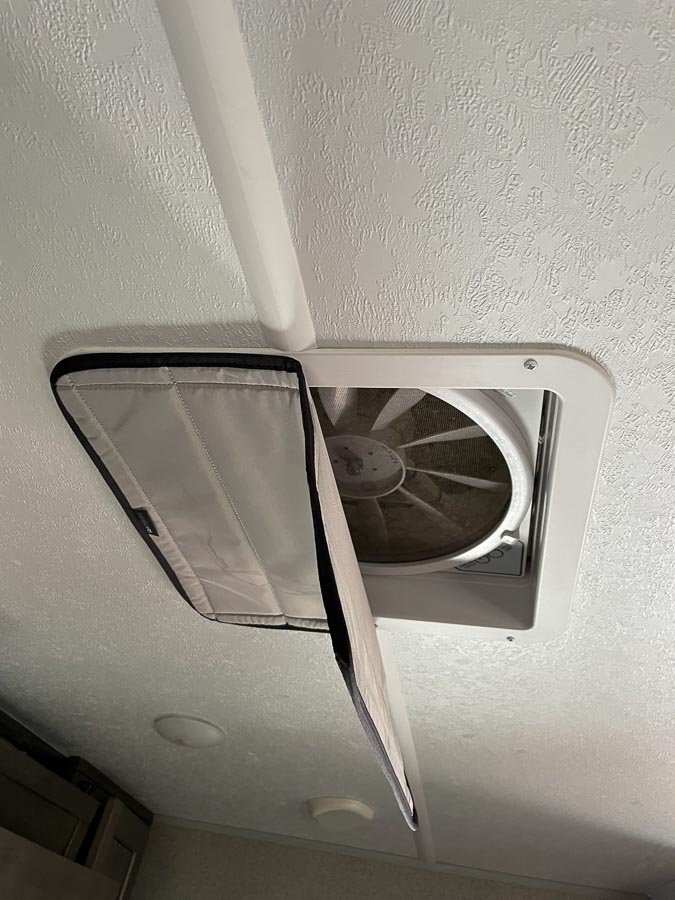
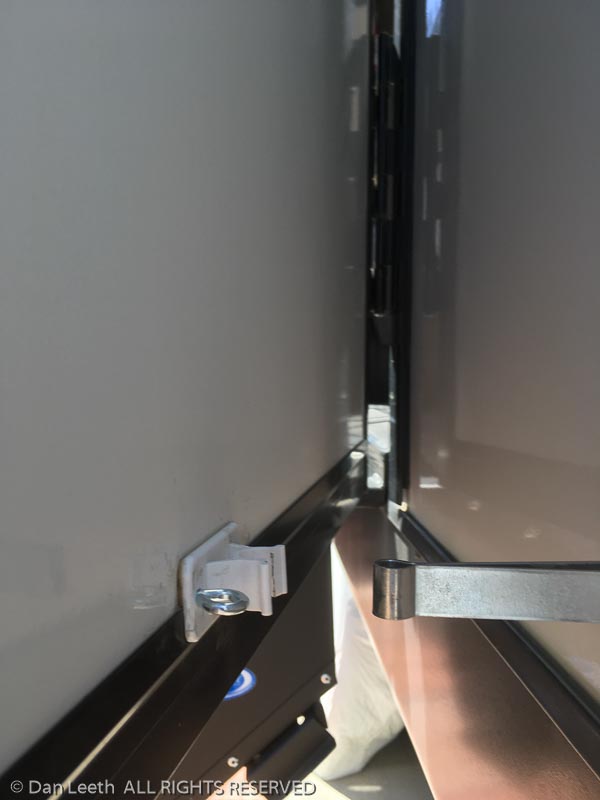
Inside, we put these covers over the Maxx-air fan openings. They’re held on with magnets taped to the inside of the vent frame. They can be loosened or removed if need be to reduce condensation. At $40 each, they’re pricey but they seem to work.

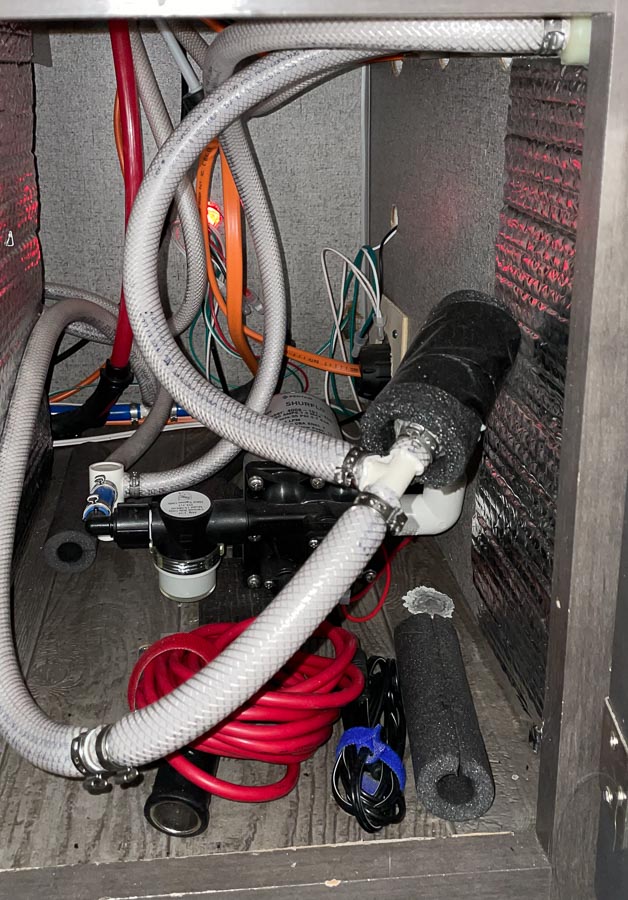
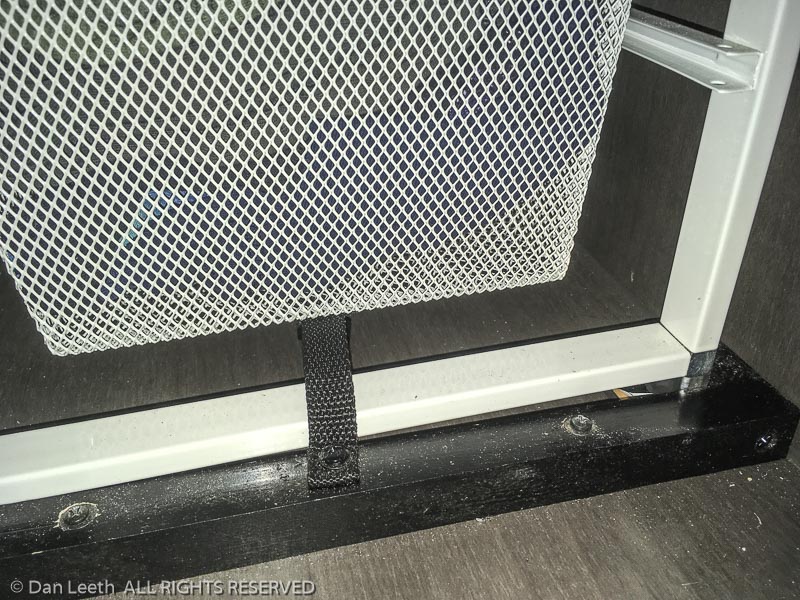
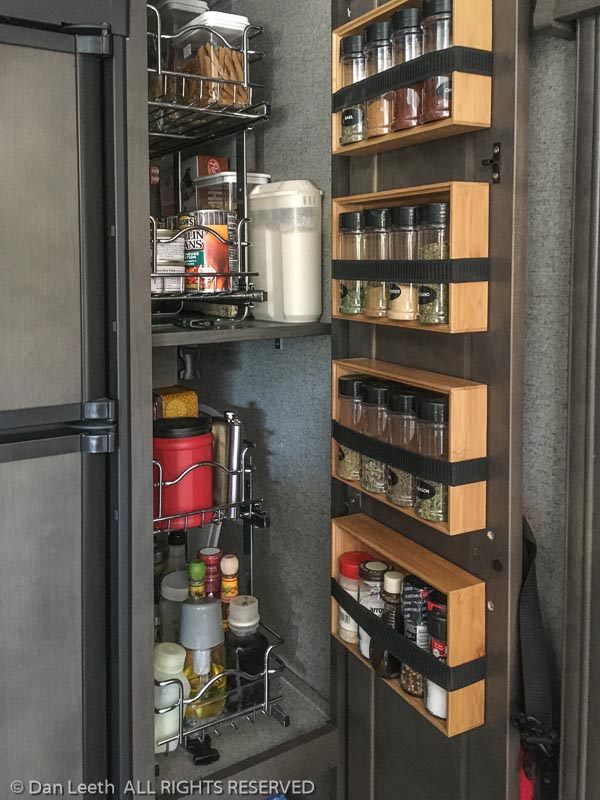
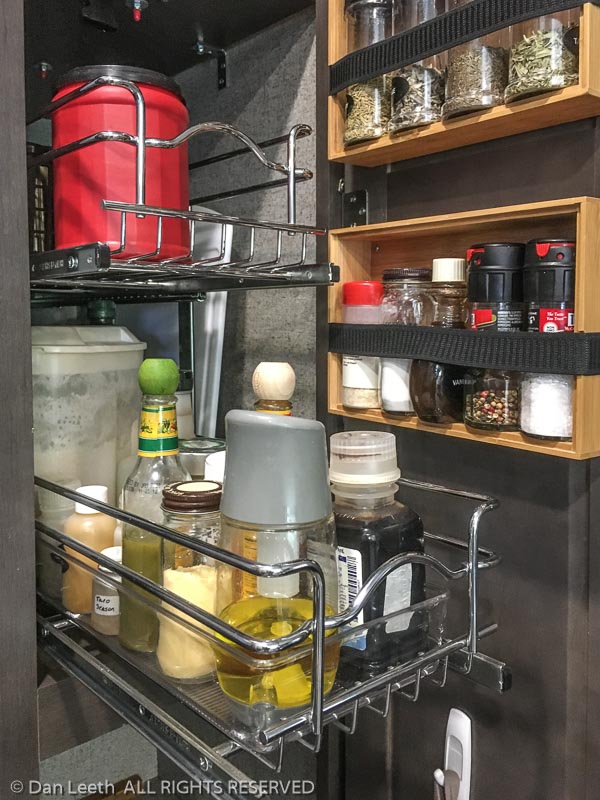
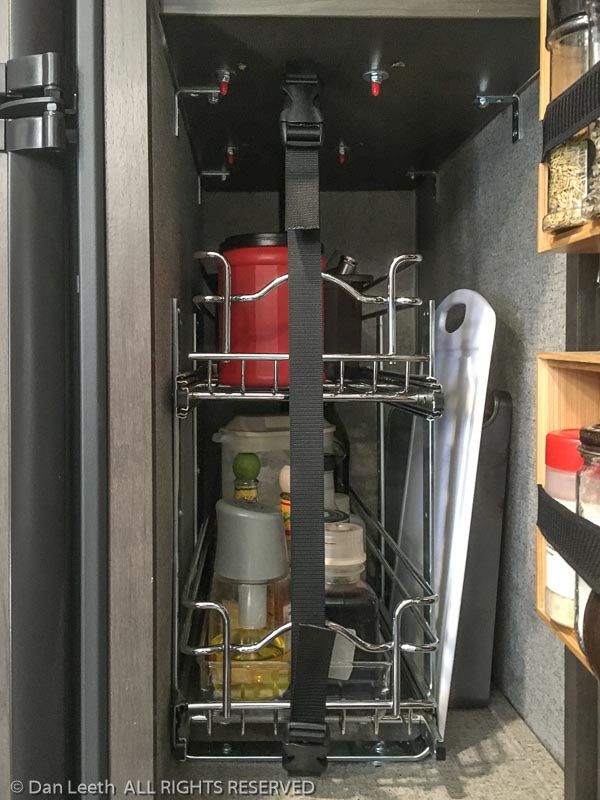
To keep the water pipes, which run near the outside walls, from freezing, we keep the pantry, water pump and water heater doors open. (We removed the panel the factory has inside those bottom compartments a long time ago.)

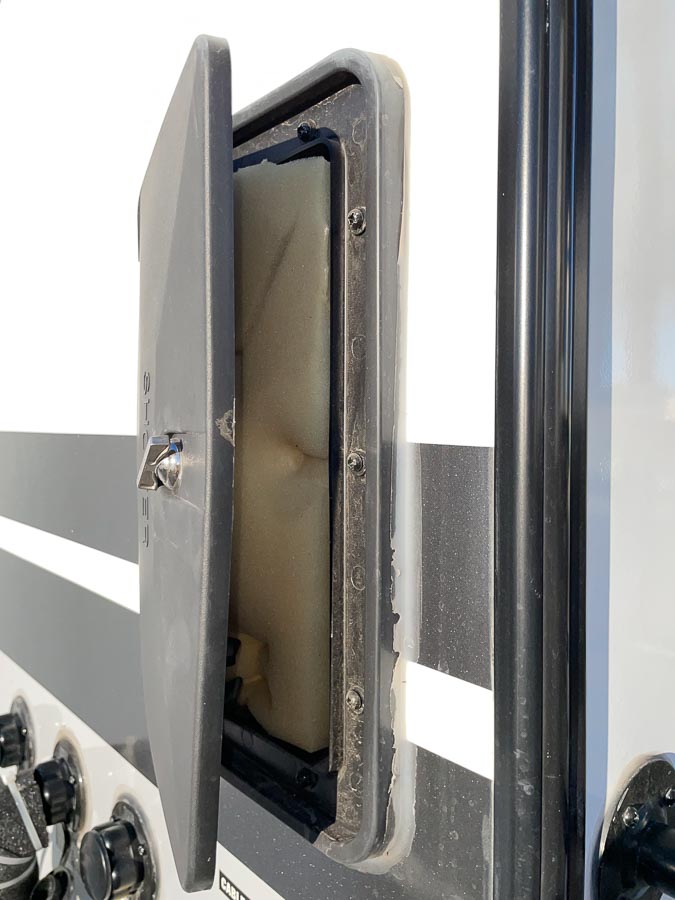
To protect the outdoor shower nozzle from freezing, I placed a piece of thick foam between the door and the plumbing. It’s not elegant, but it’s worked. Best of all, if I want to bathe outdoors in frigid weather, I can simply remove the foam pad and turn on the shower.

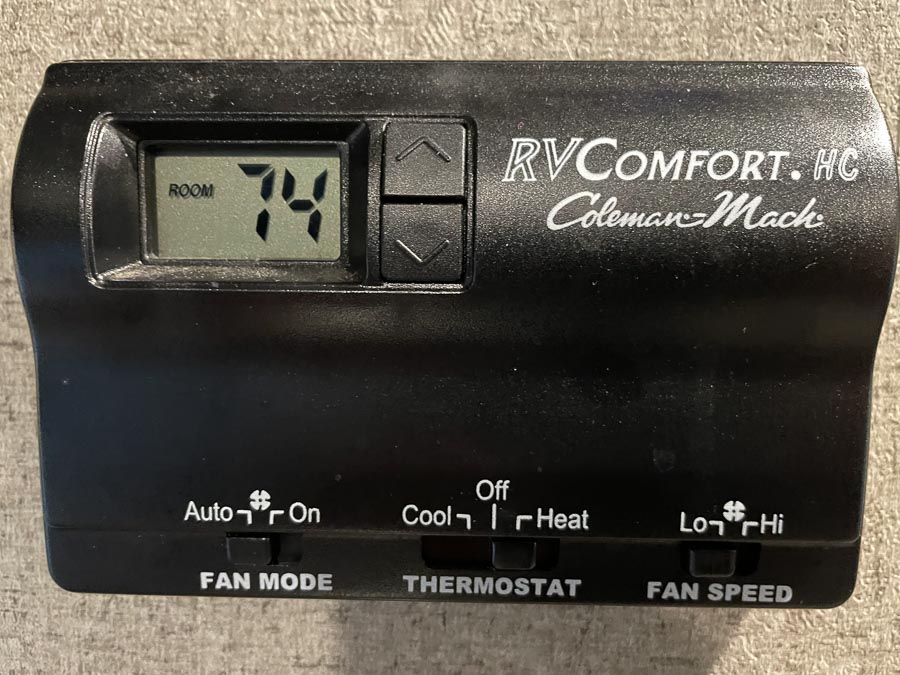
To heat the place, we have the factory furnace, which has been burning up about a gallon of propane every day. Fortunately, our RV park offers discounts on propane refills with free pickup and delivery to our trailer.

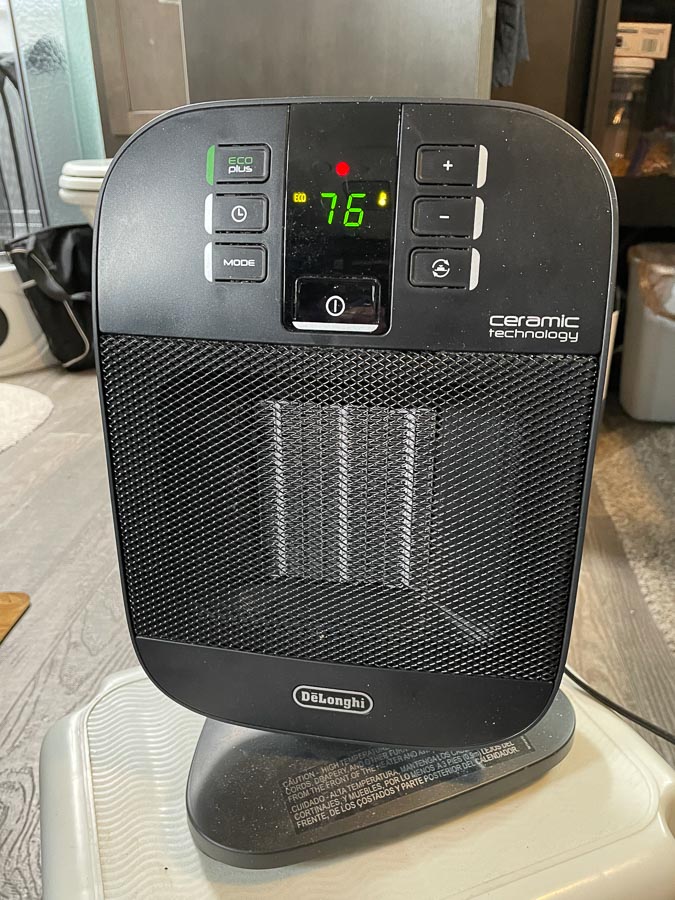
Adding to the furnace heat, we use a small space heater. It can be moved around, allowing us to put the heat wherever we want it. Those of us on monthly space rentals pay for electricity, so space heater heat doesn’t come free, but it sure is handy.

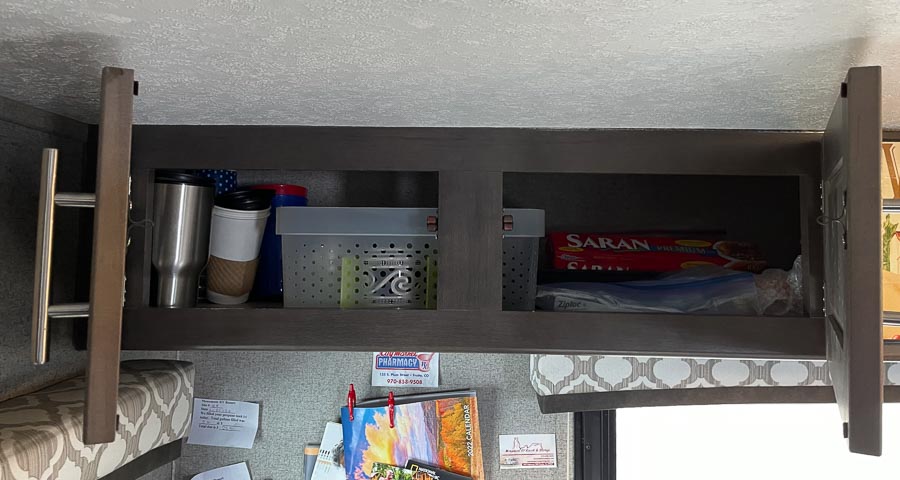
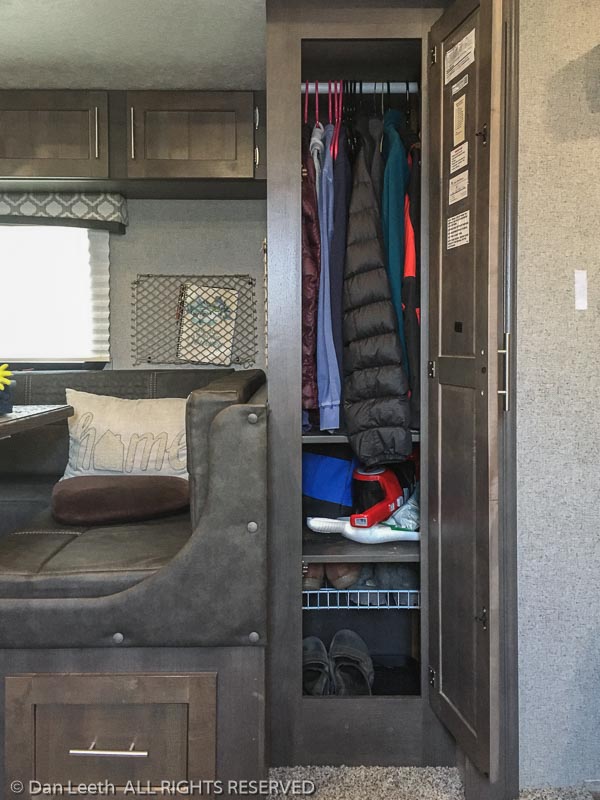
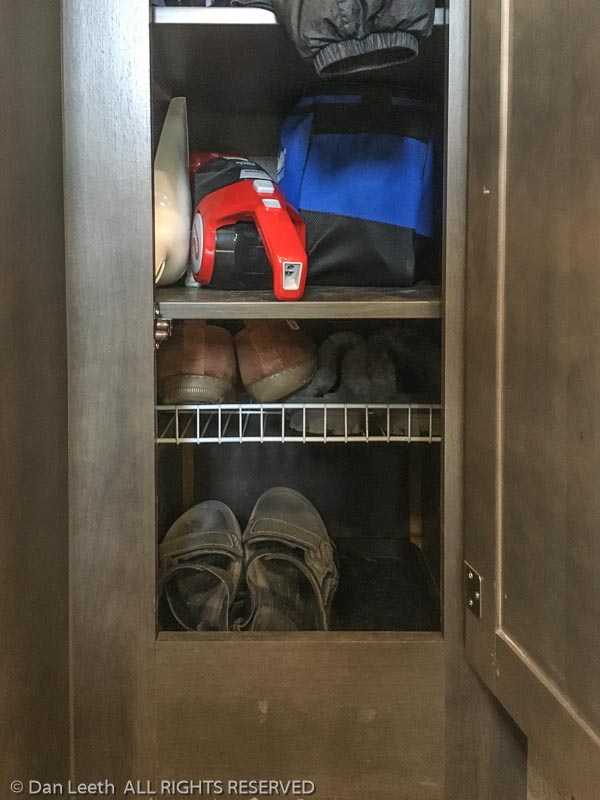
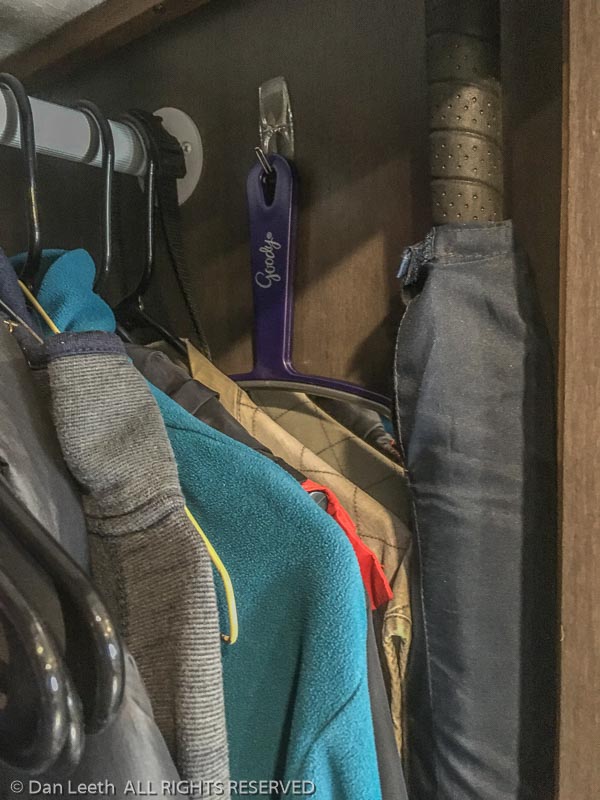
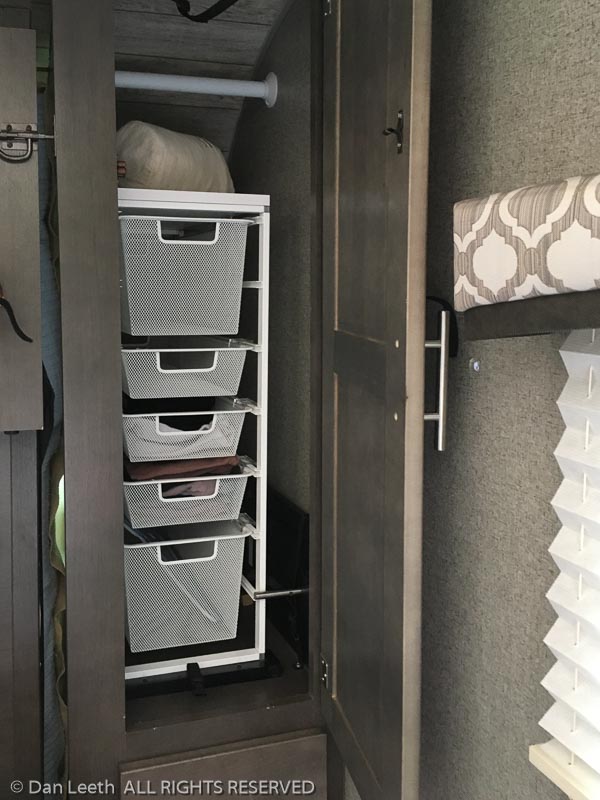
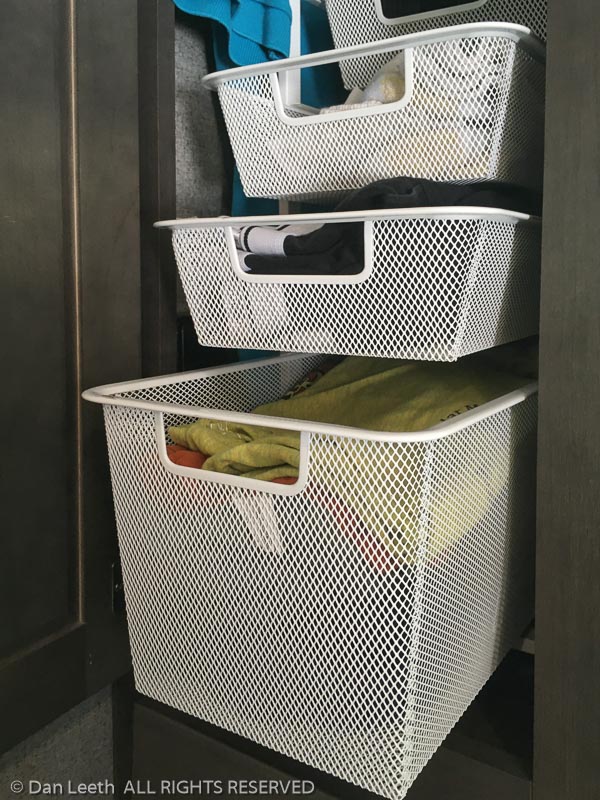
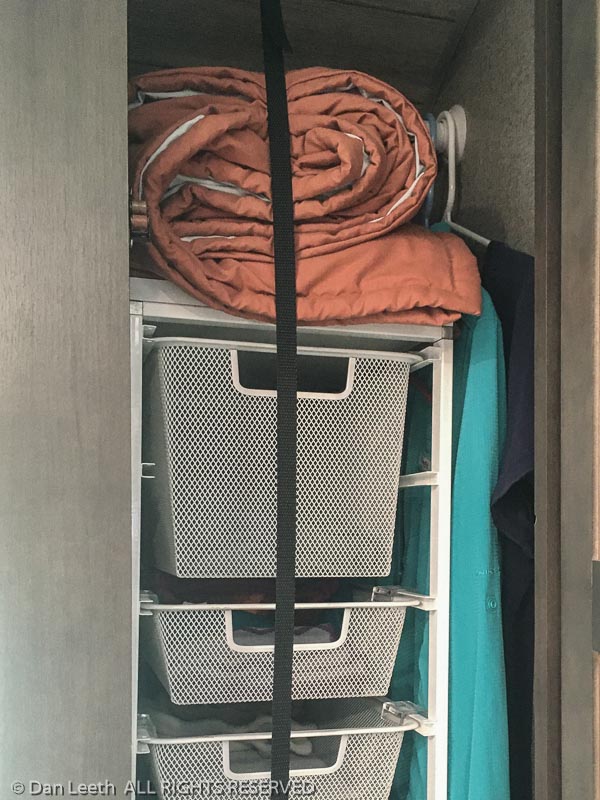
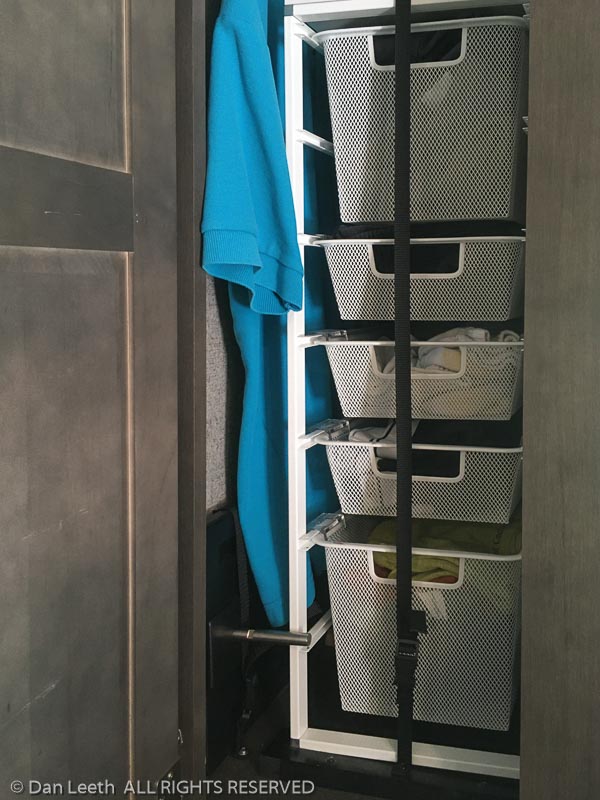
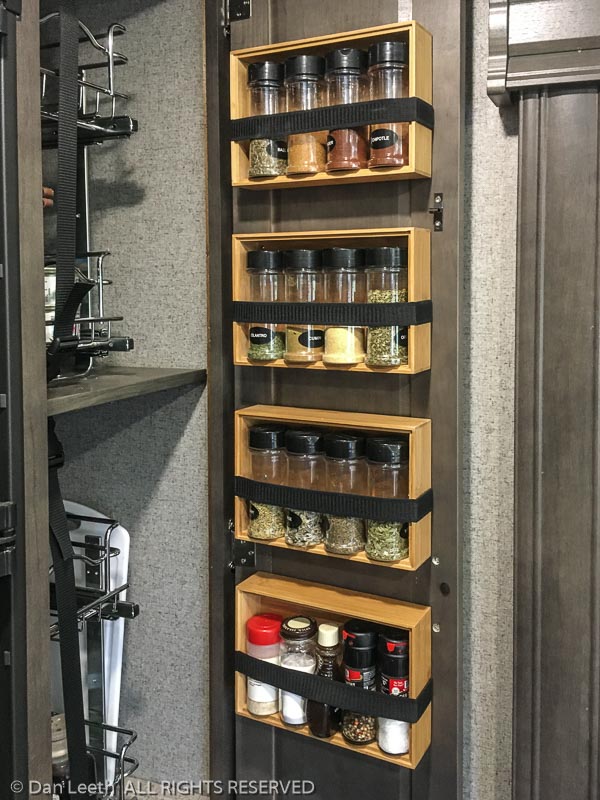
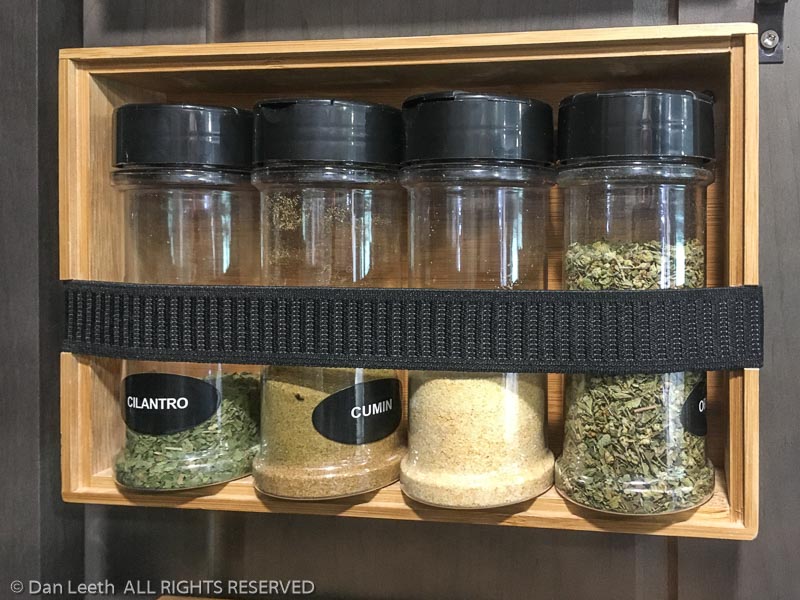
Another problem we’ve had to deal with is condensation. While the trailer can be 70+ degrees inside, the walls hover around 50 degrees or lower. Damp walls from condensation could be found in closed areas such as the inside of closed cabinets. We now keep all cabinet doors ajar during the daytime and wide open a at night.

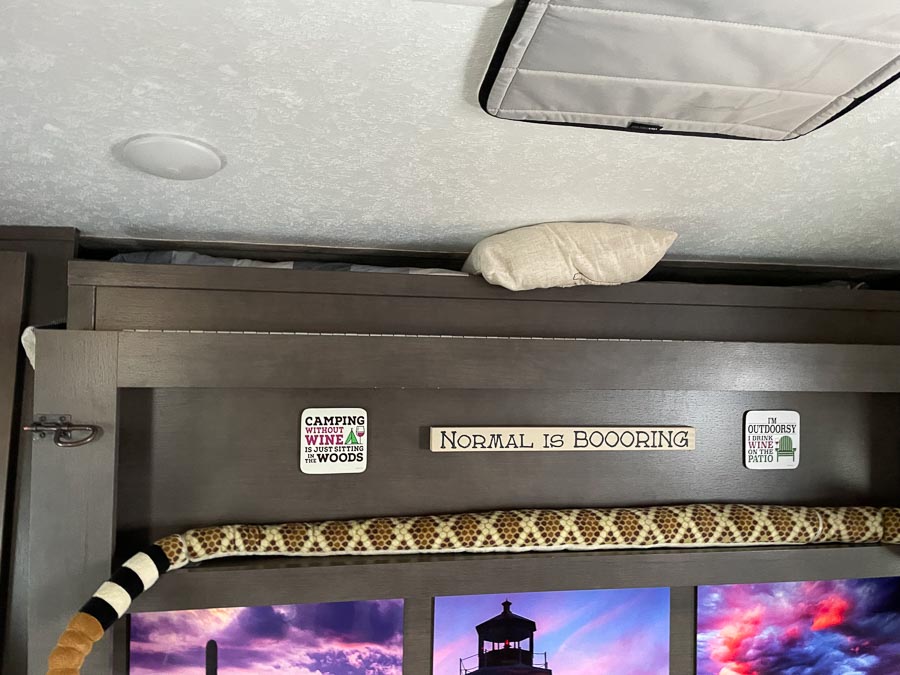
Since the area behind the Murphy bed is closed, we now prop the frame open just a bit at the top, which seems to help. The pillow jammed in there is to keep it all in place. Yes, we could just leave the bed down all day, but we like having the couch to sit on.

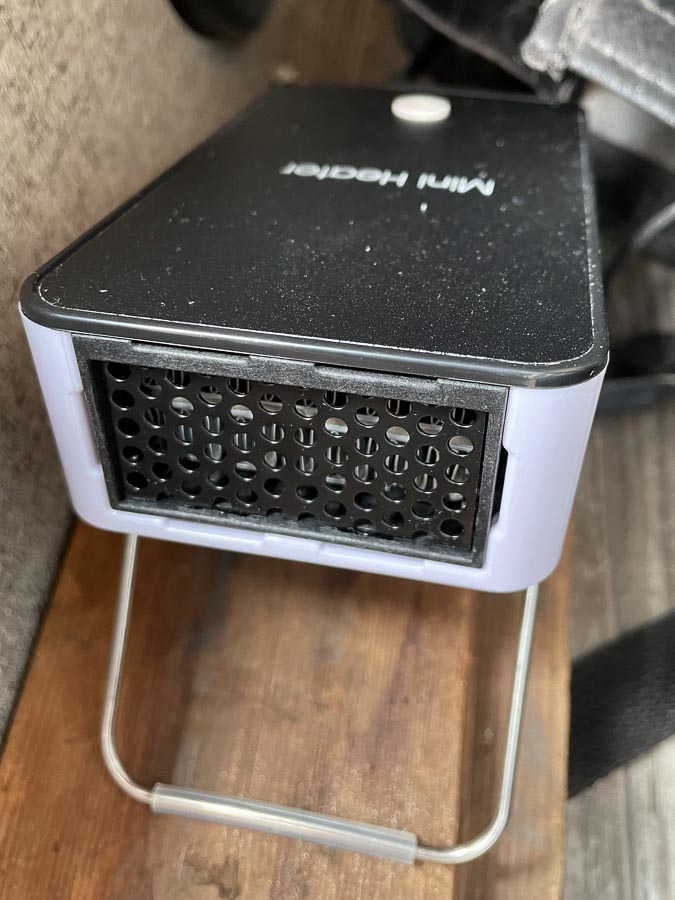
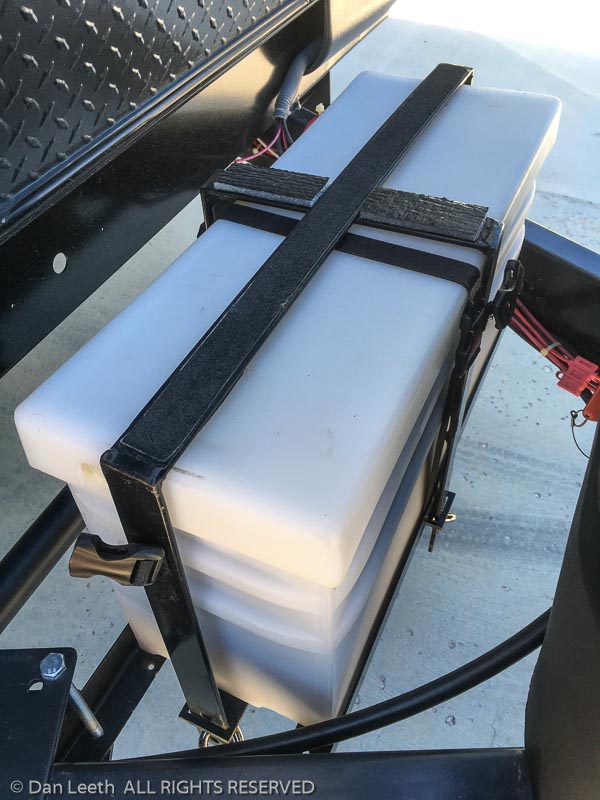
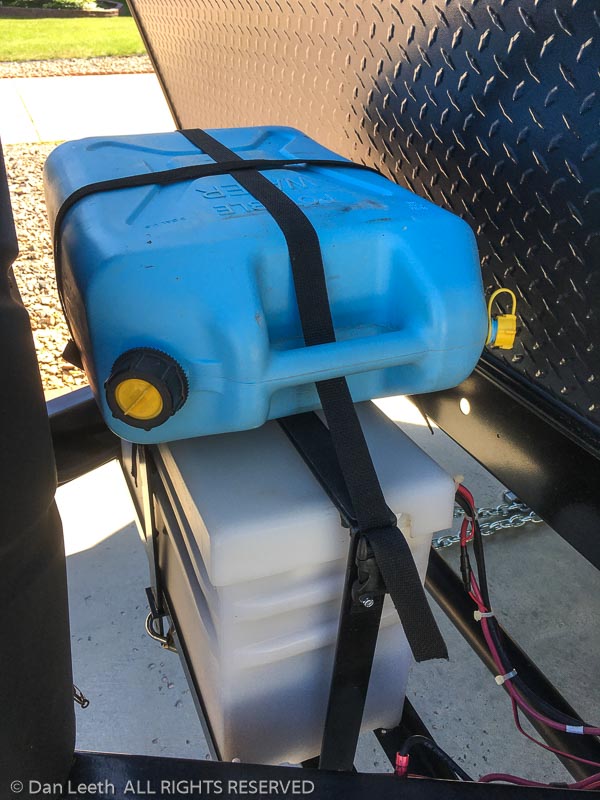
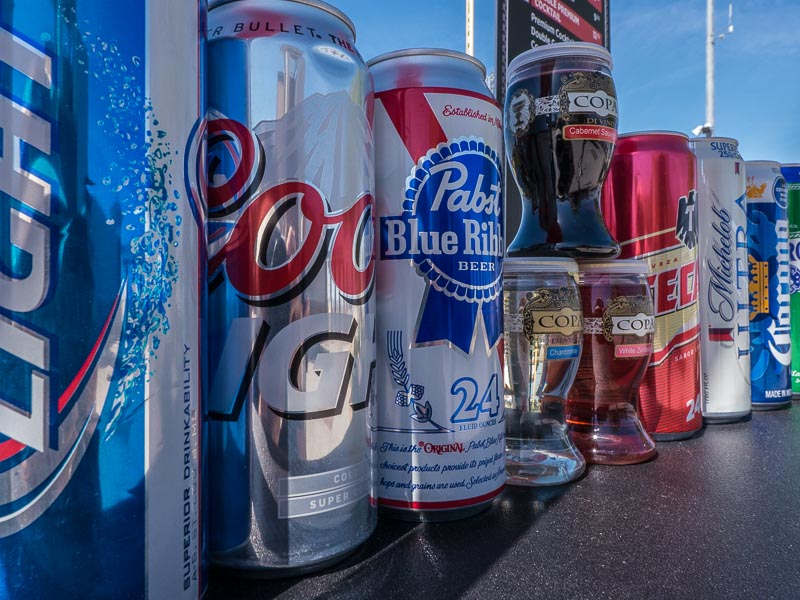
I found condensation building up in one of the storage compartments. To help keep it at bay, I added a small, 110-watt heater that runs 24/7 in the starboard storage area. It also helps to keep the wine from freezing.

And finally, to help mitigate condensation, we’ve added a small dehumidifier. We’ve also changed a few of our moisture-adding activities. Instead of showering in the trailer, we now use the RV park’s facilities and I try to refrain from doing dishes until my wife, the chef, threatens me with bodily harm if I don’t wash up her favorite spatula.

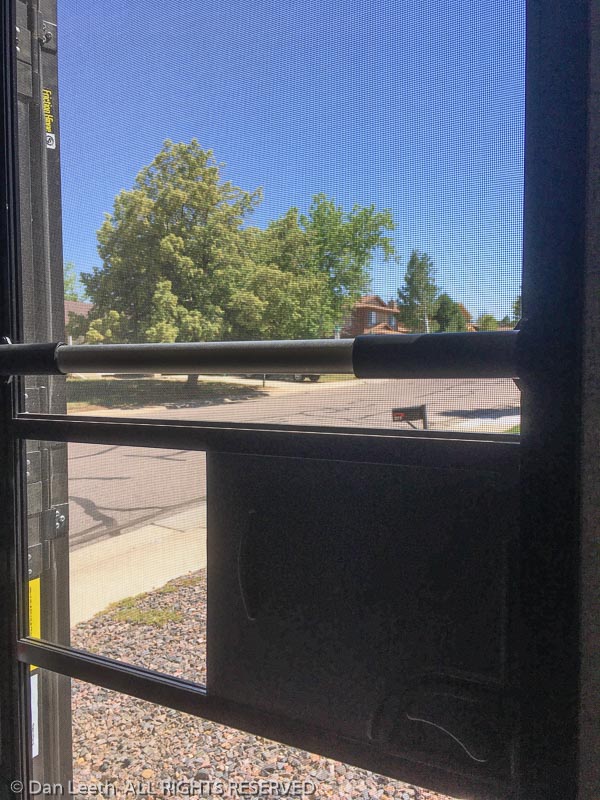
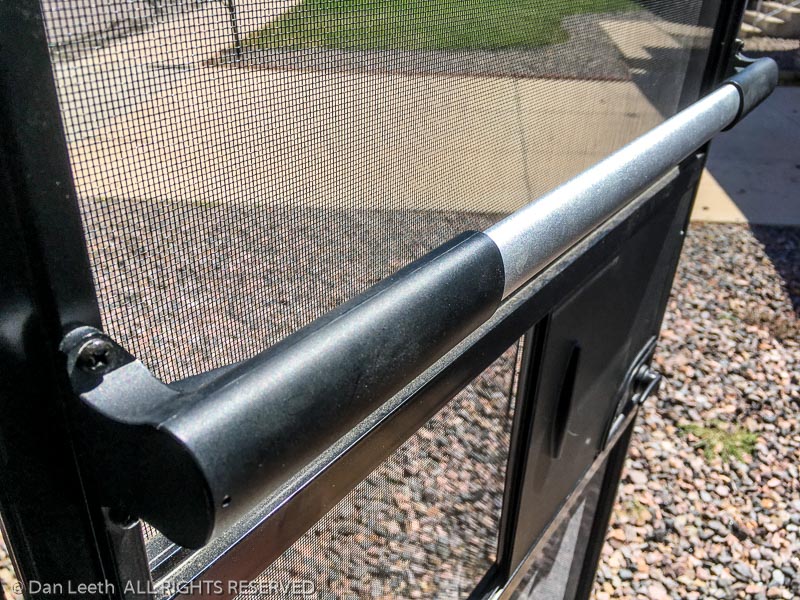
One final piece of equipment that has helped us survive the winter is the padded cover we placed over our front window last summer. We installed it to protect the glass from rock chips and breakage on the road. I thought about removing it while we remain stationary in the RV park, but my wife suggested we keep it on for its insulation value. To reward her thoughtfulness, I’m going to wash up both of her spatulas.

Our first trailer was a Rockwood A-frame foldable trailer, which came with a net pocket or two on its walls.  We found them so handy that we installed similar ones on our Rockstaff 21DS/2104s trailer.

We installed a pair on either side of the dining room picture window.  We use the table as workspace in camp, and the net pockets are useful for keeping maps, notes, journals and the like handy. 

We have a larger net mounted behind the seat on the pantry side of the slideout.  Here we store placemats and a kitchen dish drying pad. 

We have two more smaller ones above the “nightstands” in the “bedroom” where we store cell phones, Kindles, paperback books, charger cords, watches and other small objects.  Placed securely in the nets, they’re out of the way and don’t get knocked onto the floor in the middle of the night.

The net pockets are available from https://www.organizedobie.com/Net-Pockets

Trailers come with fire extinguisher as standard equipment, but at least on all the trailers we’ve owned, they tend to be rather small. 

The factory extinguisher in our Rockstaff 21DS/2104s was rated 5B:C, which means it’s good for small flammable liquids and electrical fires.  It’s not rated for trash, wood or paper.  It will put out a small grease fire on the stove, but not much more.

Following my wife’s “bigger is better, darling” lead, I installed a 3A:40B:C fire extinguisher.  In addition to being rated for flammable liquids and electrical fires, it’s also rated for wood fires.  Since the inside of the trailer is largely made of wood, I will hopefully have enough fire power to smother the flames to at least get safely out of harm’s way.  I mounted it on the floor near the door, directly below the factory extinguisher. 

Also next to the door, I installed brackets to hang a D-cell Maglite flashlight.  It’s in a handy location if we need to check something out or escape the trailer in the middle of the night. 

Above it is a cup holder bracket into which we can stick a bottle of bear spray while we’re in camp.  Haven’t needed it yet, but if we do, it will be easy to find.

My wife and I do a lot of camping without hookups and we loathe generators.  For us, a good solar charging system was a must.  Here’s how we set up the solar on our 2019 21DS (2104s for you Rockwooders):

Since we already owned a pair of Renogy 100-watt solar suitcase panels without built-in controllers from our previous trailer, I elected to go with a Victron MPPT solar controller mounted inside the trailer.  The Bluetooth feedback on this unit allows me to see exactly what my solar panel output is at any given time.  That’s something nerds like me really appreciate.

I mounted the controller behind the trim panel inside the front starboard compartment directly below the factory-installed solar plug.  A vent-covered opening in the trim panel allows for cooling.

I spliced the wires from the factory plugin, routing the input side through a fuse block and into the controller.  Power from the controller flows to the battery through the other side of the spliced factory wires. 

The old adage of “you can put that where the sun don’t shine” seems to have influenced the location where Forest River placed the solar input.  The one solitary solar plugin on the starboard front of the trailer is fine if the sun comes from that direction.  But it often doesn’t.  To allow for more solar panel placement options, I installed additional solar plugs on the three remaining corners of the trailer. 

The additional plug on the front of the port side was easy.  I just popped a hole, mounted the plugin with a rubber gasket and loads of silicone sealant.  I routed the wires through the Murphy bed cavity and into the fuse block on the opposite side of the trailer.

Plugins for the back were a bit more complicated.  For that, I drilled holes into the aluminum skirting below the trailer walls and screwed the Zamp plugs into watertight junction boxes hidden behind the skirting. 

I ran marine-grade 10 AWG wire through flexible conduit bolted to the trailer frame to connect the port plug to its starboard mate.  Another run of wire in flexible conduit along the frame and up through the floor connected the rear plugins to the controller fuse block.

It took a good six-beers to complete the project, but the end result is that I can now place solar panels (we now have three) around any corner of the trailer.  That’s handy for those of us equipped with wives who like to camp in shady surroundings.

One of the easiest projects we’ve done in the trailer is to replace our Dometic 300 toilet with the upgraded 310 version. 

The 300 is made of plastic while the 310 has a ceramic bowl, which my wife insists provides a more secure seating surface.  The 300 just dumps water in the bowl to wash out the waste while the 310 uses a “vortex flush pattern” to swirl the incoming water around to better clean the bowl. 

Best of all, the 300 has a cheap feeling plastic lid while the 310 boasts a nice solid wooden seat/lid of the slow-close variety.  Just give it a flick and it slowly and quietly closes on its own.  My wife loves that so much that she’s begged me not to put the toilet seat down so she can do it herself. 

Just kidding.

A number of lucky trailer owners had defective 300-series toilets that caused their bathrooms to smell worse than a Texas feedlot.  Under the Dometic warranty, they were able to upgrade to the 310 toilets for a mere $75.  We had to pay for ours, which we got on sale at Camping World for only twice that amount.

Installation was a one-beer breeze.  I just unbolted the old toilet and bolted on the new, adjusting the angle slightly to fit the space.  It’s now traveled thousands of miles with nary a problem.

Of course, with the good comes the bad.  My wife liked the slow-close seats/lids so much, I got to play Mr. Plumber for a day, replacing every toilet seat at home with the slow-close versions.  That project, of course, warranted a few more beers.  

Our trailer came with three, thin wardrobe closets complete with hanger rods.  The one in the slideout next to the dinette we use as a coat closet. 

I measured the length of the longest jacket we’d have hanging in there and installed a shelf at that length.  About a foot below, I installed another shelf.  The cubbyhole between the two serves as a storage location for a small space heater, rechargeable hand-vac and other miscellaneous things. 

At the bottom of the closet is shoe storage.  Fortunately, Dianne is not a shoe fanatic.  We both can go for weeks with three pair of shoes – hiking boots, camp shoes and sandals/flipflops.  A wire half-shelf in that bottom compartment adds a place for slippers. 

Finally, strapped to the side of the closet is a large golf umbrella, which comes in handy if we have to work outside in a downpour. The entire project took only a beer or two to complete.

The trailer also has two shorter closets on either side of the bed.  With rods across the top, they came ready for hanger-hung garments, but we needed a storage place for t-shirts, shorts, sox and skivvies.  We’ve seen where other Micro Lite owners have added shelves and boxes into the closet.  We stumbled on a drawer arrangement that works perfectly for us. 

On a reconnaissance mission to the Container Store, Dianne found some customizable mesh drawer arrangements.  Made by Elfa in Sweden, the parts are sold separately allowing us to put together a nifty set of drawers to hold our foldable clothes. 

First come the frames.  The extra-narrow (10 inches), closet depth (21 inches), 29-5/8-inch high frames fit perfectly in our closets.  To protect the bottom, we added the optional plastic feet.

We opted for three single- and two double-height drawers.  The single height work well for sox and dainties.  The double-high ones are good for t-shirts and shorts.  Optional stops allow the drawer to fully extend without pulling totally out.

To cap it off, we installed the optional white melamine top shelves, which provide a convenient space to store an extra blanket or more.

The drawers fit in the closet with the back of the top shelf touching the curving roof of the closet.  Small blocks of wood screwed to the closet floor keep the shelves from shifting forward or from side to side.  Remove a screw or two and the whole stack can be removed if necessary.

With the drawers anchored close to the bed side of the closet, there’s still room to hang a shirt or two on the closet rod.  We added webbing straps at the bottom to hold the rotating “end tables” in place for travel.

Removable vertical webbing straps keep the drawers from sliding forward during travel.

We’re quite happy with our closet drawers.  They’re extremely light weight and they allow us to pack quite a lot clothing into a small space.  With the drawers opening fully, everything is handy including those things placed in the back. Dianne earned a beer for her drawer discovery while I consumed another putting ’em in.

Unfortunately, these Elfa products are hideously expensive.  The retail price for what we installed comes to around $140 or so for each side.  Fortunately, Elfa products are frequently on sale at the Container Store.  We got ours at 30% off, which made them only bloody expensive. 

We typically spend three-four months in the trailer every year, so the cost was worth it to us.

“Happy wife.  Happy life.”  My wife insists that I passionately believe that old adage.

To make my wife the happiest cook in the campground (or at least at our site in the campground), I modified the pantry in our Flagstaff 21DS.  This four-beer project began with removing the factory shelves from the pantry. 

In their place I screwed in a pair of Rev-A-Shelf heavy duty pull-out wire shelf stacks (model 5WB2-0922CR-1 fit our trailer), about $100 each from Amazon.  These shelves fully extend and are rated for 100 pounds, which makes them perfect for a pantry.  The lower unit bolted into the pantry floor.  Remounting one of the factory wooden shelves halfway up provided a base for the upper shelf stack.

The shelves were mounted flush against the refrigerator side of the pantry, which allows space on the other side for cutting boards, griddle and other vertical objects.  A pair of removable webbing straps keep the shelves from moving when we’re on the road. 

Wife loves the new shelves.  Husband loves them, too, especially when he discovers that someone has moved his flask of Cognac to the very back of the top shelf.

Next came the spices.  We’ve seen many, many ideas about where to put a spice rack in the trailer.  The person I need to make happy did not want anything mounted on an outside wall (too hot) or exposed to a window (no sunlight).  My solution was to put the spices into the pantry.

I bought some six-by-nine-inch bamboo stackable drawer organizers from Lowe’s (about $6 each).  Using my wife’s best one-inch-wide emery board nail file (she was gone), I sanded inch-wide notches in the sides for elastic straps to go across.  The boxes were then carefully screwed into the fat part of the pantry door.  With Amazon providing spice bottles and labels, my wife filled the racks with her spicy favorites.

The one downside to this arrangement was that the pantry door handle kept the door from fully opening.  We couldn’t extend the sliding shelves past the spice boxes.  After considering various options, I solved that problem by simply grinding a bit off the door handle bases.  It’s a bit more difficult to grip, but the family cook says that’s a small price to pay for having everything so handy.

She’s happy, which means I’m happy.  She even brought me another beer.

Over the years, we’ve spent a lot of time and money trying to figure out how to tote our bicycles on trailer trips.  With our previous trailer, we ultimately decided the best way to carry the bikes was on the front of our tow vehicle.  We mounted a Curt front receiver for our Xterra and slid on our Swagman bike rack.  Worked fine.

Then we upgraded both the trailer and the tow vehicle.  Neither Curt nor anybody else made front receivers for our new Nissan Titan. 

At the dealer’s suggestion, we ordered our trailer with the optional Lippert Jack-It bike rack, which fits around the electric jack on the front frame.  Unfortunately, to be able to open the truck tailgate with the trailer attached required mounting the jack sideways.  That meant removing the Jack-It.

We considered and rejected a few other options such as carrying the bikes in the trailer or in/on the truck.  The best option seemed to be a variation of what other folks have done and simply mounting a receiver on the trailer’s back bumper and sliding in the bike rack.  Not only would this get our bikes to camp, but by then moving the rack to the back of the truck, I could take the bikes to nearby trailheads.  

The bike rack conversion turned out to be a three-beer project.  To beef up the bumper to carry the load, we installed a pair of Mount-N-Lock Safety Struts (around $85).  These supposedly increase the weight capacity of the bumper to 400 pounds according to the folks at eTrailer.  To our reinforced bumper we bolted on an Eaz Lift RV Bumper Hitch (around $48 from Amazon). The hitch, rack and bikes weighed 100.8 pounds.

Mounting the bikes close to the bumper required moving the spare tire to another location, removing 43.2 pounds from the bumper.  To do that, we bought a BAL Retract-A-Spare (about $100 from Amazon), which allows the spare to be carried under the trailer.  It works just like the spare tire carriers found on most trucks and SUVs.  A cable fits through the spare and is raised and lowered with a turn of a removable crank. 

For ground clearance purposes, I wanted to put the spare as close to the axles as possible.  While I would have preferred a back-of-the-axles location, the sewer drain plumbing on one side and the grill’s propane orifice on the other necessitated a front-of-the-axles mount.  Three beers later, the job was ready for testing. 

We hooked up the trailer, mounted our bikes to the back and did a 250-mile drive down the pothole-infested piece of pavement known as Colorado’s Interstate 70.  Eying the bikes through the observation (backup) camera, they traveled solidly with no sway, and the spare tire came through still tightly mounted to the undercarriage of the trailer. 

All that called for yet another brew or two.

Gone are our old pair of 65-amp lead-acid batteries.  In their place sits a new LiFeBlue 200-amp, low temperature lithium iron phosphate battery.

After considering several options (including the popular Battle Born brand), we chose the LiFeBlue, which comes with Bluetooth battery monitoring.  With my iPhone or iPad, I can look up the voltage, the state of charge, how many recharging cycles it’s gone through, the status of each cell bank inside and more.  This is in addition to what I get from my battery monitor.

Then there is size.  This 200-amp LiFeBlue battery fits in a battery box made for two group 24 or two GC2 golf cart batteries, which is what we already owned.  Although Battle Born makes a 100-amp GC2-size battery, the group 27s that Battle Born and others sell would not have fit.

Another reason we chose LiFeBlue is that they offer an optional low temperature lithium battery.  Most lithium RV batteries cannot be recharged in subfreezing weather.  If the battery is located inside the RV/trailer, that may not be an issue.  Ours, unfortunately, must be mounted outside.  Our low-temperature battery has a built-in heating unit that allows it to be recharged in cold conditions.  It’s not often we’ve been camping in subfreezing conditions, but it has happened.

To prevent theft of the batteries, we bought a battery shackle (about $150 from batteryshackle.com).  Thick steel and three padlocks pretty much ensure that any thief is going to have to work his tail off to abscond with this battery.

Our Battery Shackle is mounted upside down with the padlocks on the bottom.  This gives us a flat area to strap on an empty jerry can or two we can use in camp for hauling water when we’re boonie camping.

To fully charge a lithium battery, one must install a power converter specifically designed for lithium batteries.  There are several replacement units available to transform our stock WFCO 8955 converter into a lithium-ready converter.  We chose the WFCO WF-8950L2-MBA, which required little more than undoing a few screws and disconnecting/reconnecting five wires. 

We now have 200 amp-hours of battery power available for boonie camping.  With lead-acid batteries, one is warned to never go below 50% of the available amp-hours.  Lithium does not have that limitation.  Plus, lithium batteries with the proper power converter/solar controller will charge up many times faster than lead-acid batteries.  We’ll test that out on our next camping trip.

One fringe benefit of lithium is weight.  Our two lead-acid batteries that came with the trailer weighed 78.4 pounds in total.  The lithium replacement only weighs 55.4 pounds.  That’s a weight savings of 23 pounds…

…which means we can carry 30 more 12-ounce beers onboard without increasing the trailer load.

We’ve made two big improvements and a pair of smaller ones to our front door. 

The first improvement was to install a Camco screen door bar, which cost about $15 from Amazon.  The handle provides an easy means to close screen door when the outer door is open.  It’s a very common fix that should have come as standard equipment.

The one-beer installation required drilling a few holes and screwing the bar into the door frame.

The second big improvement, a two-beer project, was to replace the stock door window with a Thin Shade window.  We’ve been camped in places where the morning sun has come blasting through the front window, blinding us as we’re trying to eat breakfast or work on our computers. 

The Thin Shade window has a built-in blind that can be raised to block out all light from entering through the window.  When not in use, it folds up into the window frame, totally out of sight.

There are two brands of Thin Shade windows commonly available.  We went with the Lippert unit (about $100 on Amazon), which is the same brand as the original.  The package included everything needed, including the clips one needs to remove the original window.

The AP Products brand unit is a few dollars cheaper, but one must contact the company to get the clips needed to remove the old window.  While the Lippert replacement goes back on without screws, the AP shade uses screws. I like the clean look of the Lippert.

The Thin Shade comes with see-through tinted glass, which most people prefer.  We happen to like the frosted glass for its privacy factor.  Instead of using the tinted glass provided, we just reused the frosted original. 

Two other two minor modifications were attempts to provide a means of keeping the door open on a breezy day in camp.  The first was to install a door-holder clip (about $10 from Amazon).  We used one of these on our old A-frame trailer with so-so results.  On this trailer, the clip proved far too anemic to hold in even light winds.

The latest thing we’ve tried to hold the door open is a bungee cord.  I simply replaced one of the door-clip screws with a small, screw-in eyebolt and did the same with one of the trim screws on the side of the trailer.  With an eight-inch bungee strung between the two, the door should stay open.

When not in use, the bungee clips on the wire rack, which we installed when we removed the TV.