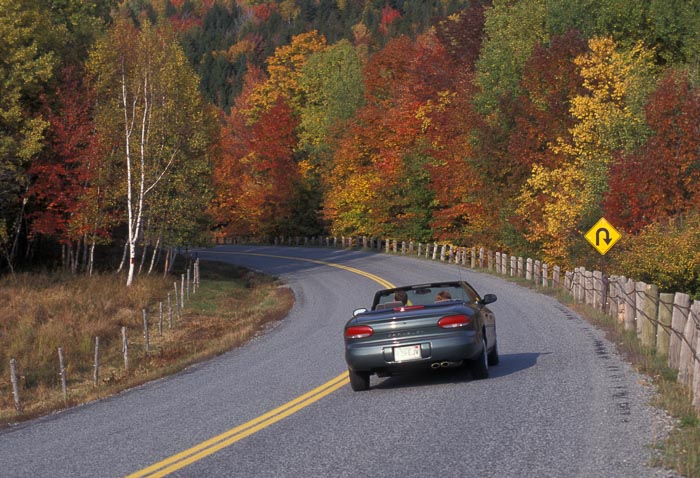
After our free breakfast the next morning, we hit the road heading for Durango and on to Utah. In Cortez, we faced a choice. We could go straight and follow a county road along McElmo Creek to Aneth, Utah or we could take the longer way and follow U.S. and state highways. Not knowing if the McElmo route was paved all the way, we opted for the longer route. Our little Mazda is not a dirt-road car.
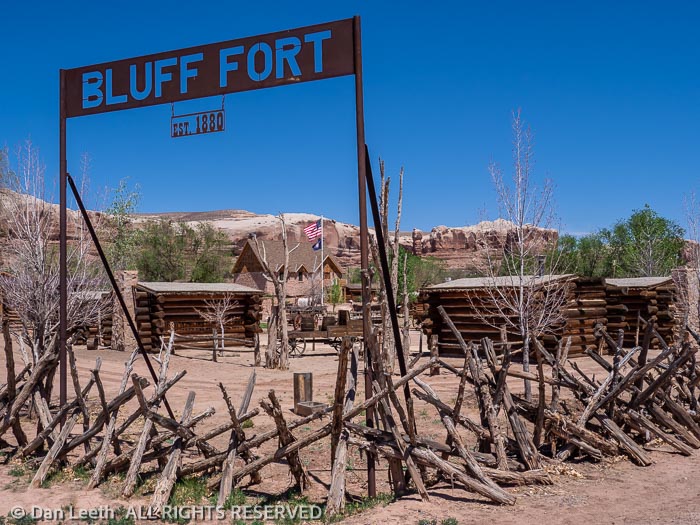
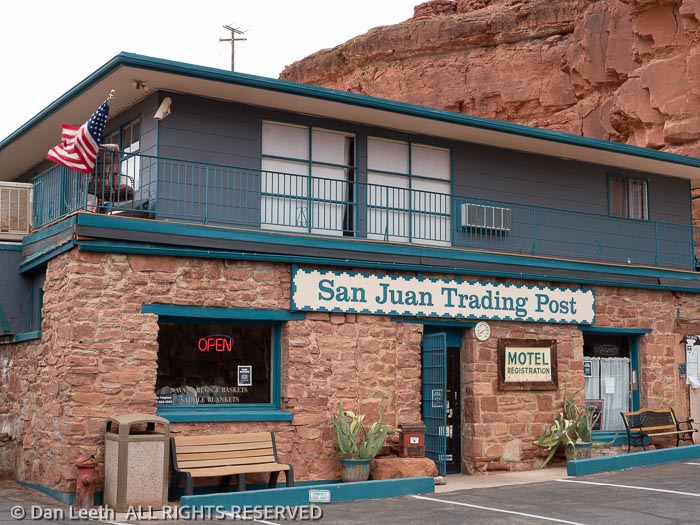
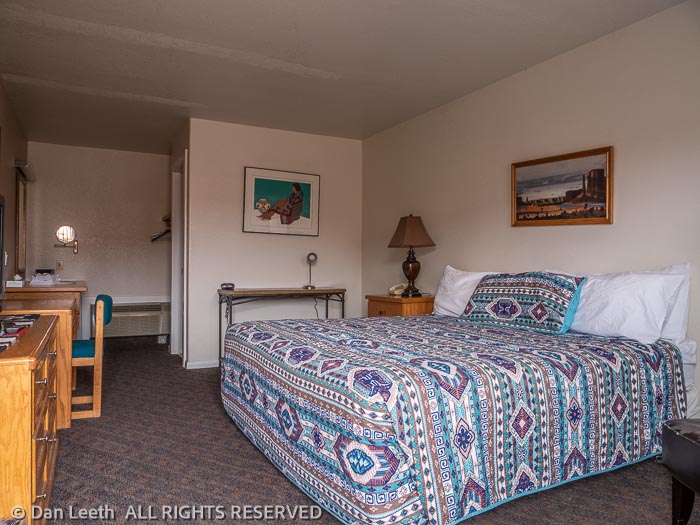
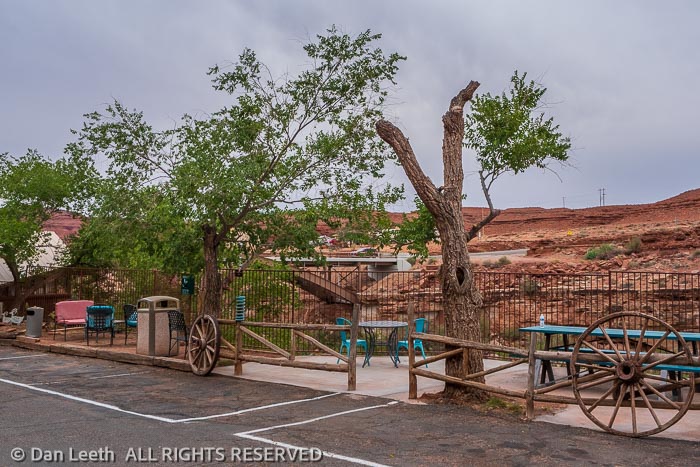
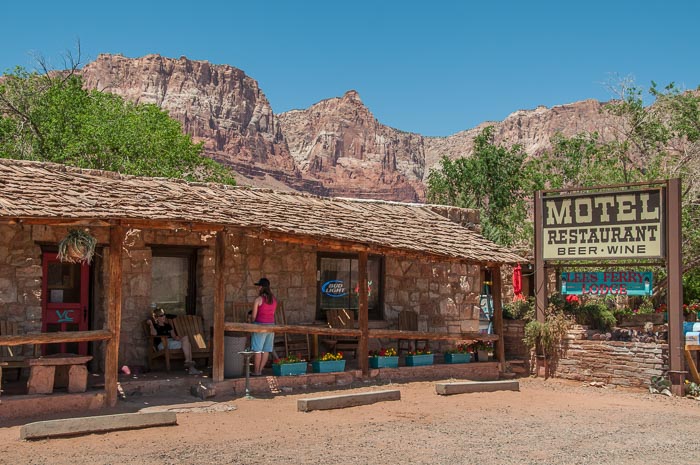
From Aneth, we headed onward to Bluff where we stopped for ice cream cones at Bluff Fort, an LDS church-run outpost/museum honoring the founders of this little, environmentalist-friendly town along the San Juan River. We continued west to Mexican Hat where the highway crosses the river. Our motel, the San Juan Inn sits next to the bridge on the cliffs above the river.
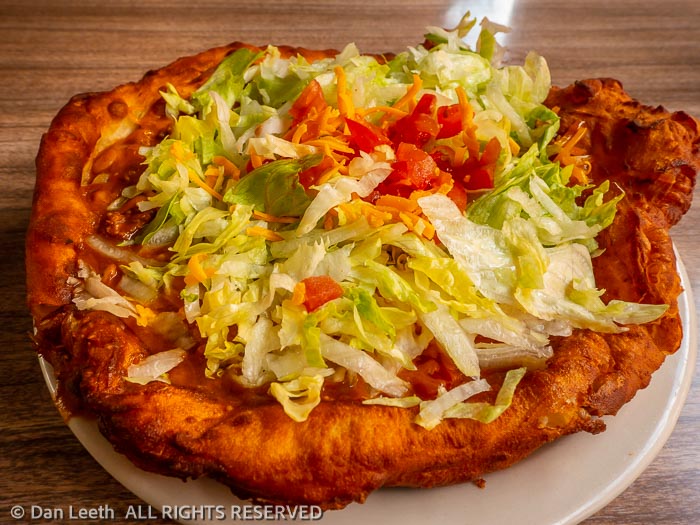
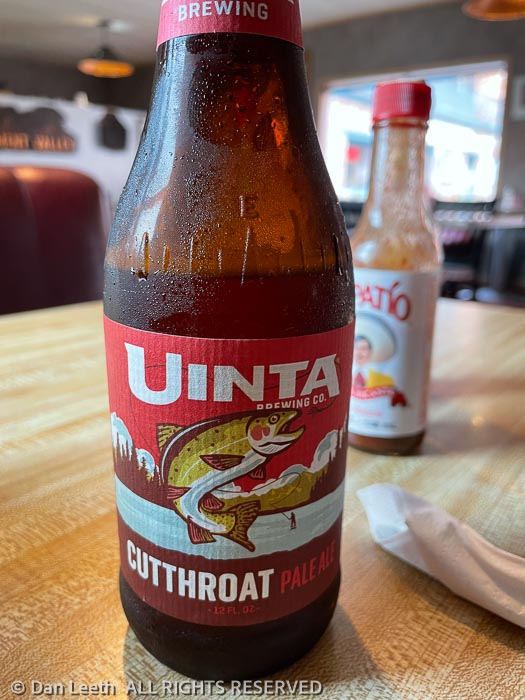
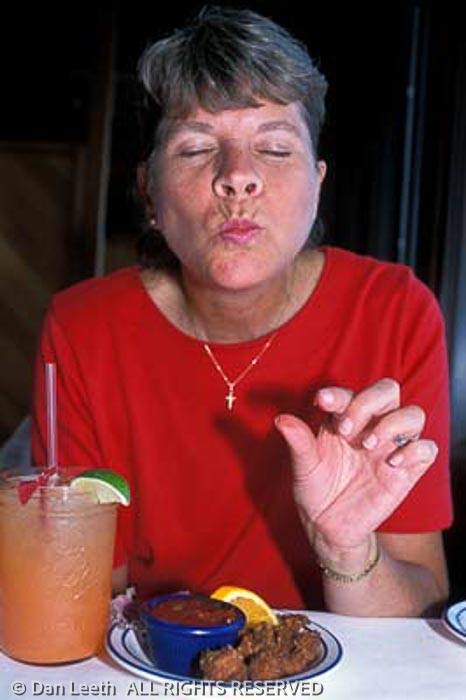
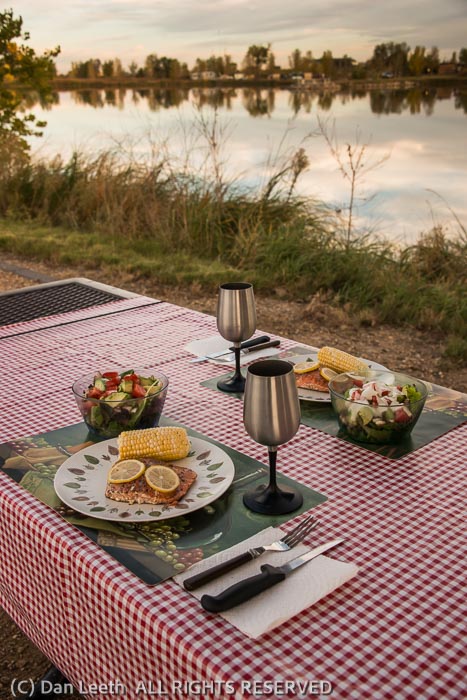
While we’ve only stayed at the Inn once before, we’ve stopped here for food many times. Their restaurant serves one of the best Navajo tacos we’ve found this side of the reservation. For the uninitiated, let me explain that a Navajo taco is a flat sheet of fry bread covered with ground beef, pinto beans, lettuce, tomatoes, cheese and other goodies. I have to say the ones we had on this trip didn’t seem as good as what we’d had before, but the beer was better.
Run by members of the alcohol-abstaining LDS church, the state of Utah has had some of the most restrictive liquor laws around. One of them was that all beer sold in grocery stores and served at normal restaurants could contain no more than 3.2 percent alcohol by weight. That’s four percent alcohol by volume (the measuring system used by the rest of the world), which is less than Coors Light.
Dianne is a notorious label reader. No product in the grocery store reaches her cart without her reading the package’s label in its entirety. As we were tasting our tacos, she read the label on her beer.
“Five percent ABV,” it said. Mine said the same.
When asked, our waitress said that last year, the legislature changed the rule to now allow real beer (5% ABV maximum) to be sold and served. To make up for the increase on the beer side, they lowered the threshold for DUI to 0.06% BAC (the rest of the country is 0.08%). Good ol’ Utah.
While the room was comfortable, what we liked about the place was the abundance of places to sit outside and admire the environment. With glasses of wine in hand, we watched the setting sun light up the sky, saw a heron swoop overhead and perch on the motel roof and we listened to the braying of the miniature donkeys, which live along the river below.
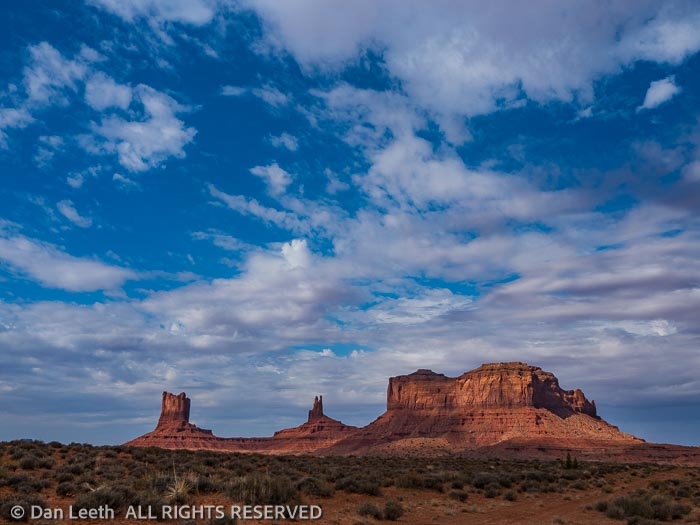
While an American breakfast of sausage and eggs would have been more to my liking, Dianne had some leftover banana bread she wanted to eat for breakfast. I opted for Hostess doughnuts purchased at the gas station mini mart instead. Tanked up with fuel and sustenance, we set off across the San Juan River and onto the Navajo Reservation, passing Monument Valley along the way.
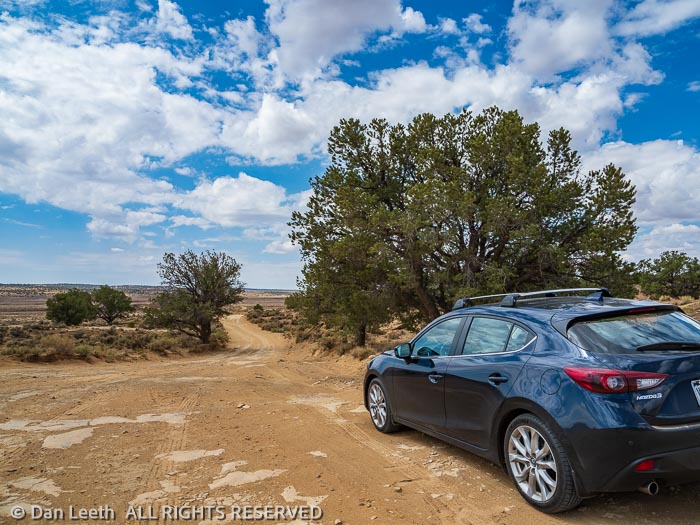
Our destination, the Hopi reservation, lies wholly within the Navajo reservation, and there are several roundabout ways to get there. Lacking an Arizona road map (always come prepared), we looked up alternative routes on Google. The online map showed a nice direct, reservation road that would take us directly to where we wanted to go. We decided to check it out.
The first few miles led up past the Peabody Coal Company’s Black Mesa Mine. It was paved and in better condition than much of I-70 in Colorado. Thinking it would be like this the whole way, we continued onward.
Miles inland, the pavement stopped, and gravel began. Too far along to blindly turn around, we bit the bullet and continued onward. In spite of being on an Indian reservation in the middle of nowhere, we amazingly maintained cell coverage and thus, Google map coverage.
Every time we came to a junction, Dianne (a descendent of Wrong Way Corrigan) would consult Google to determine which way to go. After a lot of dirt-road miles with a couple of wrong turns, we arrived literally right next door to the Hopi Cultural Center, our destination.
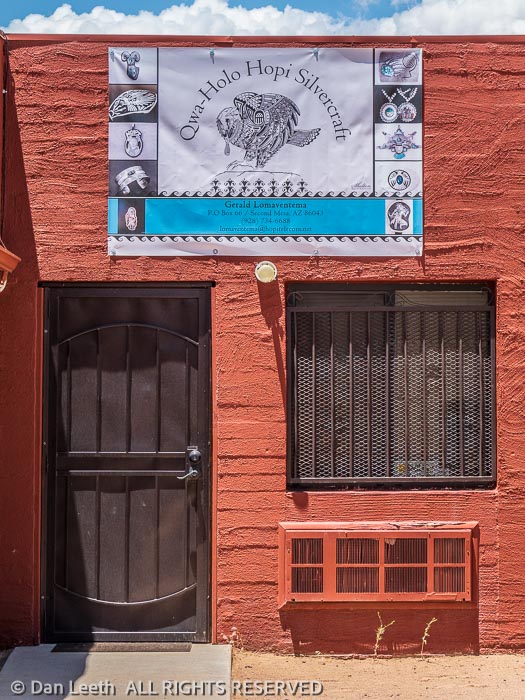
We arrived a bit earlier than planned and our silversmith-jeweler, Gerald Lomaventema, was not at his shop. Dianne eventually reached him by phone and found out he had a function he had to attend that morning but was on his way.
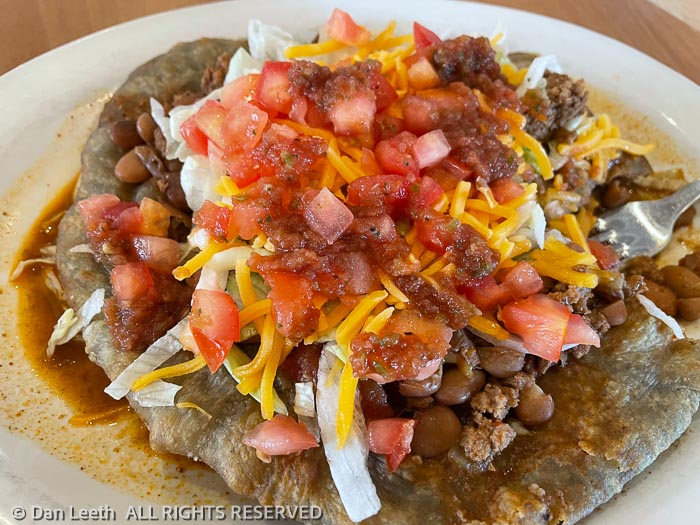
While waiting, we ordered lunch at the Cultural Center’s restaurant. Naturally, we ordered Hopi tacos, these coming on blue corn frybread. Much better than last night’s fare, even without any beer.
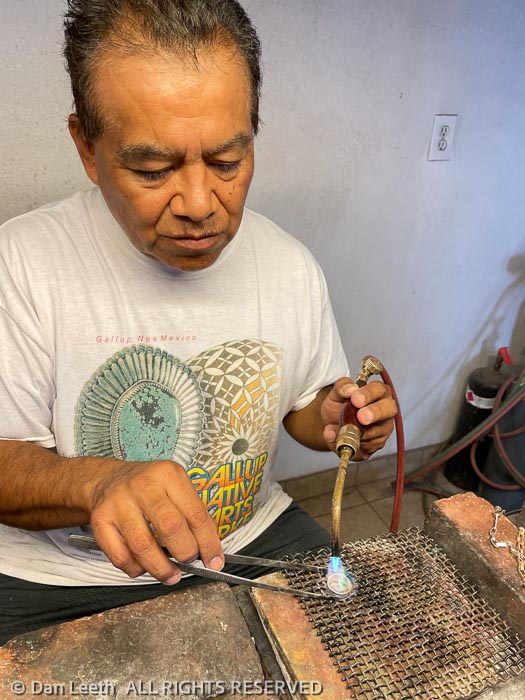
Gerald arrived and brought out the ring. Dianne put it on and found it was a bit too big. “I can fix that,” the craftsman promised. “We’ll have to go to my studio, however.”
We followed him past a sign saying passage beyond was not open to non-natives and on to his house. There in a shop the size of a double-car garage, he cut and resoldered the ring into a smaller version. It was still too large for Dianne’s petite pinkie.
“I can fix that,” the man said.
Gerald repeated the process about six times until the right size was obtained. While he did this, his wife took my ring and some other Hopi jewelry Dianne brought with her and reoxidized the black and repolished the silver. Mine came back so shiny, I could use it to reflect sunlight onto any rescue planes searching for us should we try to recross the reservation on those back-of-beyond Indian roads. Fortunately, we had nothing but paved highways from here to our next stopover in Gallup.
I grew up in Arizona and spent a fair part of my youth exploring parts of New Mexico. I’ve passed the exit to Gallup many, many times when traveling I-40 from Flagstaff to Albuquerque. Other than filling the gas tank, I’ve never had much of a reason to explore the town.
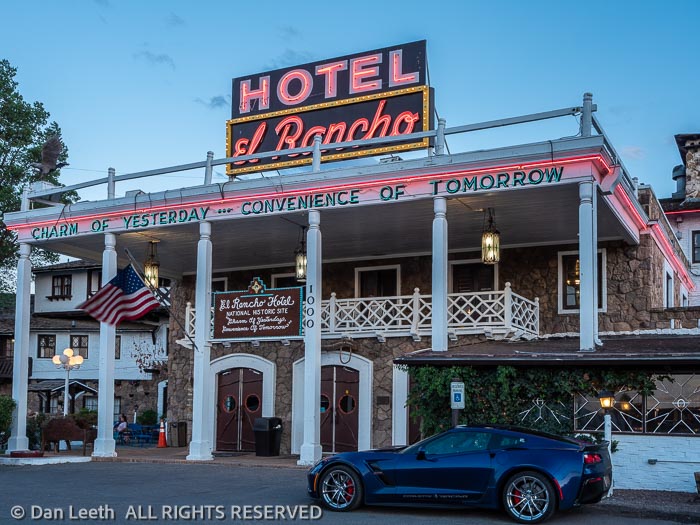
As a travel writer, I’ve been invited to countless events where tourism reps from various places promote their properties by plying us writers with free food and drink. One such event was sponsored by New Mexico tourism. The young lady representing the city of Gallup made a big deal out of the El Rancho Hotel on historic Route 66, which she claimed was a popular spot for movie actors. We would check it out.
When we arrived, the parking lot was filled bumper to bumper with cars. We finally found a spot in a side lot next to a worksite filled with rolls of carpet.
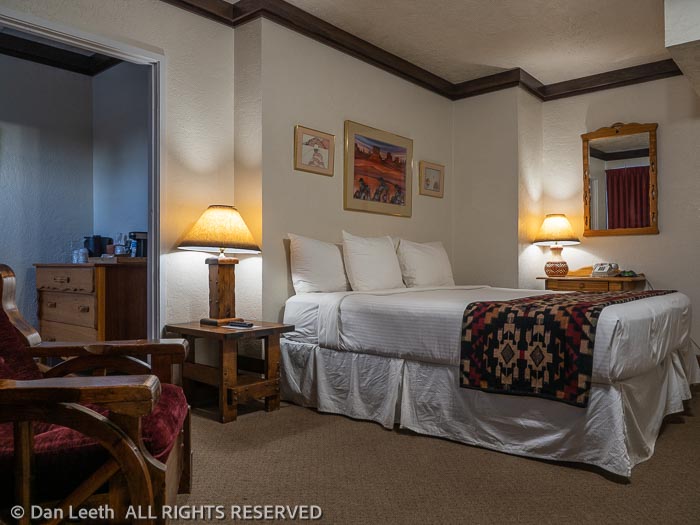
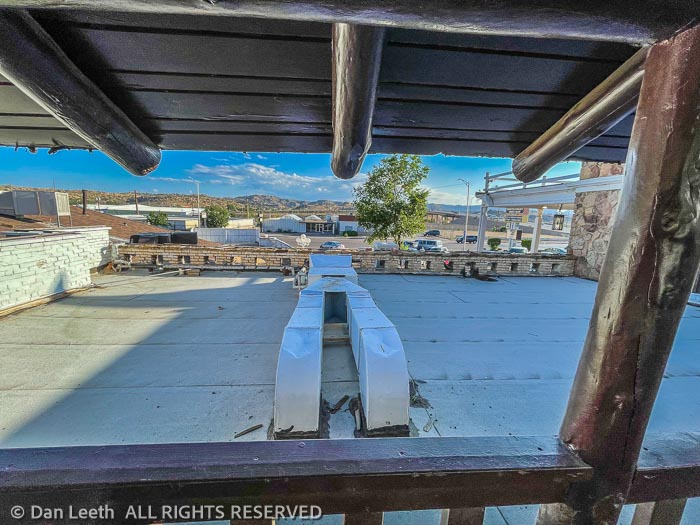
Our second-floor room was spacious and had access to a balcony shared with three neighboring rooms. It offered an excellent view of HVAC ducting with the parking lot, highway and rail tracks beyond.
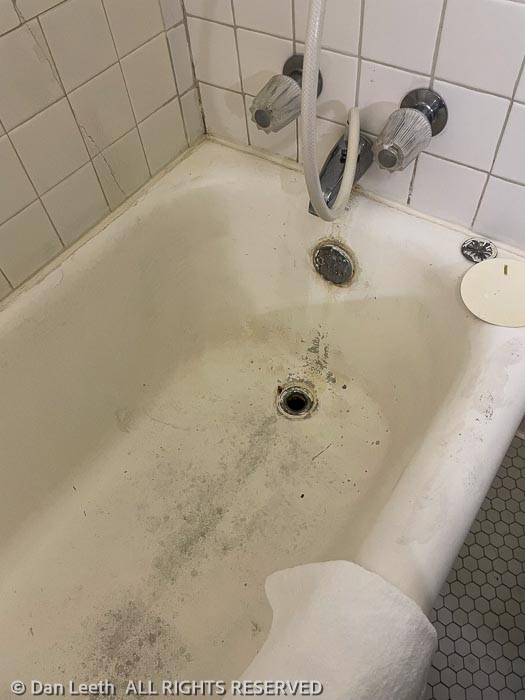
The bathroom was tiny, bearing a sink with no counter. The pitifully worn-out bathtub could have been a reject from the Bates Motel.
El Rancho Hotel, Gallup, New Mexico.
The hotel lobby, however, was a photogenic gem, the kind of place one would expect in a classic, Indian-country hotel. The restaurant beyond, was a bit disappointing, but the food was good and the margaritas drinkable. I had planned to order a good ol’ American breakfast there the next morning but ended up with breakfast enchiladas instead. The sausage and eggs would wait.
“How was your stay?” the young desk clerk asked when we checked out.
“It was okay,” I answered, refusing to say anything more.
A road trip these days frequently involves interstate highways, and for us, it would be nothing but divided highways to home. We tanked up with fuel, bought a bottle of wine at Safeway, a venti of Komodo Dragon brew at Starbucks and with cruise control set for 75, we were on our way.
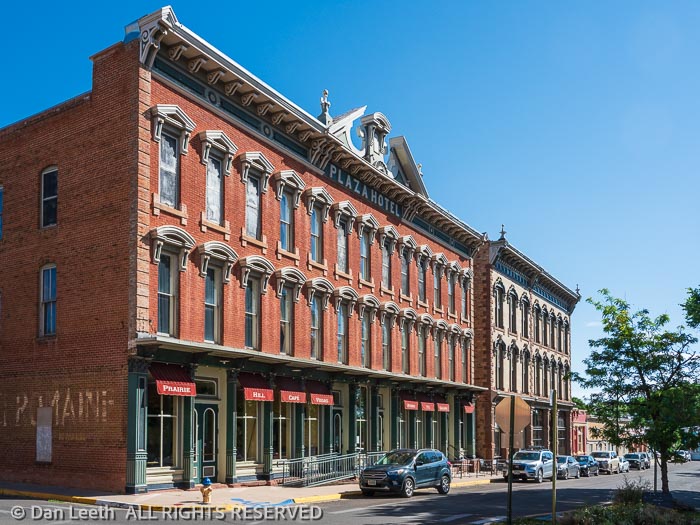
Speeding down I-40, we breezed into Albuquerque and turned north onto I-25 heading toward Denver. Cruising past Santa Fe, we continued north to the turnoff for “the other Las Vegas,” the one in New Mexico. Here we had reservations for a plaza-view room at the old Plaza Hotel.
The room was spacious and bathroom clean and inviting. The view overlooked Plaza Park, a grassy enclave where we were told a band would be playing later in the afternoon. We got a recommendation for a good Mexican restaurant and decided to check out their margaritas before the music started.
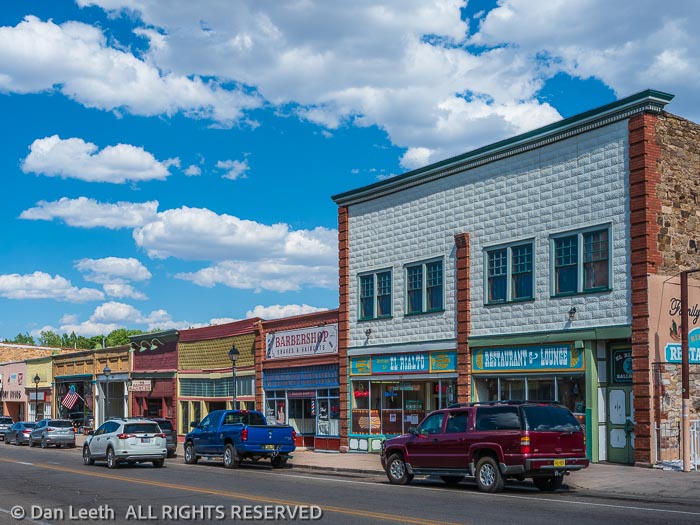
One would think that in a Spanish colonial-style town of 13,000 whose downtown features art galleries, storefront lawyer offices a classic barbershop offering shaves and haircuts, an afternoon concert would feature mariachi music or maybe country western or bluegrass.
Nope. This afternoon’s entertainment was head-banging, ‘80s-era hard rock. They were pretty good (loud), but let’s just say a little went a long way. With the concert still going, we retreated to the Mexican restaurant for dinner.
Hard rock band playing in the plaza, Plaza Hotel, Las Vegas, New Mexico.
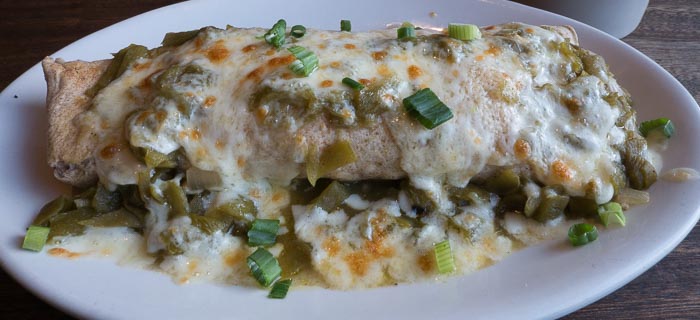
In a state, whose official state question is “¿red or green?” (referring to flavor of the chiles), I knew I wasn’t going to stoop down to ordering a good ol’ American breakfast the next morning. Following the recommendation of the front desk clerk, we walked to a little mom ‘n’ pop Mexican restaurant.
While I’m downing a breakfast burrito, the owner comes by, introduces himself and over a few minutes of quiet conversation, reveals a few tidbits of his life story.
Other than the challenge of trying to find an empty bay at a gas station in Raton (we’d like to welcome all of you Colorado-bound Texans), it was an easy drive from here to home.
Compared to camping, road trips offer numerous advantages. Driving a small, nimble, pavement-hugging car is more fun than cruising in a three-ton truck pulling a three-ton trailer. I can just put the car in cruise control and actually pass other vehicles on the highway, such as slow-moving trucks pulling trailers.
We can easily stop at any roadside attraction of interest along the way, we burn far, far less fuel (35 mph vs 8 mph) getting there. On longer trips, the gas savings can be enough to cover the cost difference between a campground site and a cheap, Super 8-quality motel room.
It takes minutes to check into a motel and minutes to check out. Even if we remain hooked up in a pull-through campsite, it typically takes us an hour or more to set up or take down.
On a car trip, we often have a choice of lodging options ranging from rooms in cheap, independent motels to suites in super luxurious properties.
Best of all (from my wife’s point of view), on a road trip, Dianne doesn’t have to cook. Instead, we can sample interesting local cuisine prepared by knowledgeable chefs. Or we can eat at Denny’s.
Maybe I’ve been camping too long, but with all the advantages of road trips, I found our ring road trip a bit disappointing.
With camping, even in the most crowded RV parks, we have quick access to the outdoors. We can sit outside and feel the breeze, listen to the birds, swat the mosquitoes, admire the sunset and gaze at the stars. Most motels are places built for staying indoors.
We can walk around the campground and chat with fellow campers. Few folks say more than “hi” to fellow patrons at a motel, but at a campground, folks are generally more than willing to talk to strangers.
Having gone through a long year of Covid concerns, when camping we enjoy a feeling of safety when eating and sleeping in familiar quarters shared with no one else.
Best of all (from my point of view), my wife (an excellent chef) cooks our camping meals with food purchased in grocery stores.
It’s far cheaper than restaurant food, usually healthier (I gained three pounds on our ring trip), and I don’t have to leave a tip.
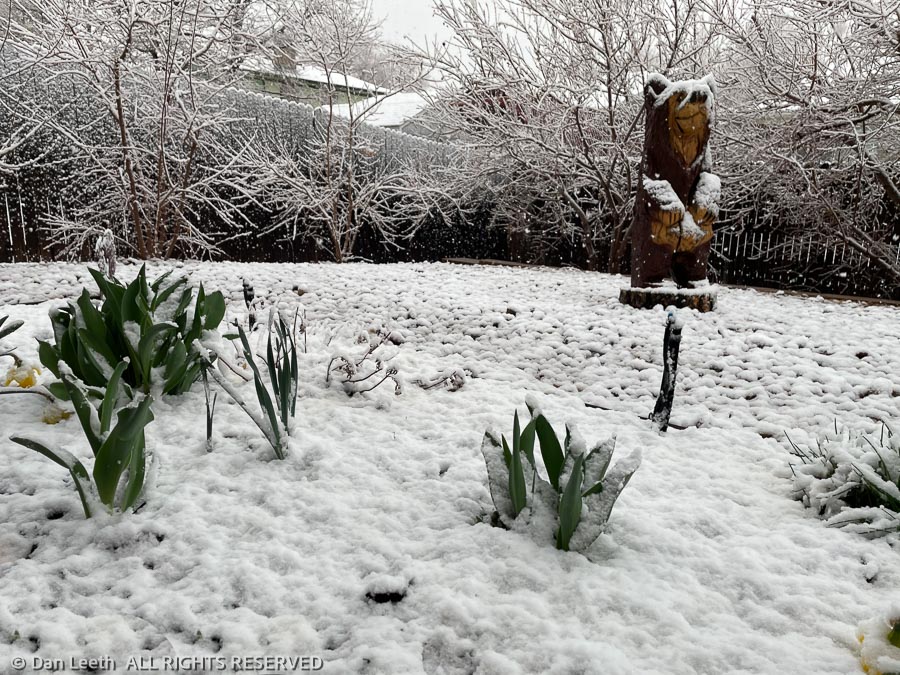
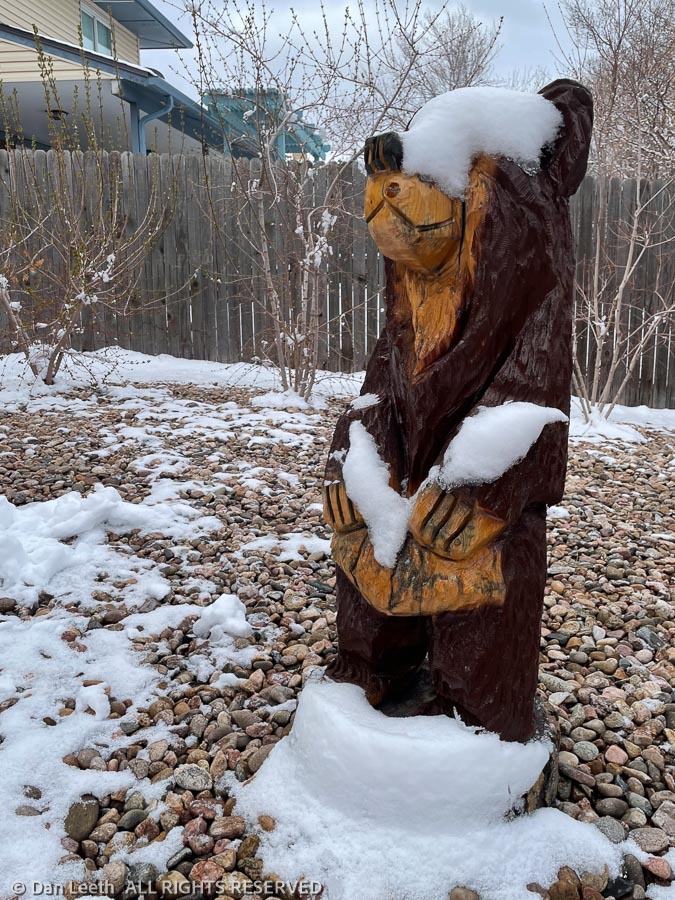
Spring is in the air. It’s mid-April, and the flowers are beginning to bloom. Denver temperatures are supposed to be in the 60s with sub-freezing lows long gone for the season. It should be perfectly safe to turn on the plant watering sprinkler/drip-system and hit the road.
Oops. This is Denver.
We’ve planned a 36-night camping trip to the canyon country of western Colorado and eastern Utah. We have friends joining us for the first part of the trip. Camping reservations have been made and paid for. The trailer’s been dewinterized and we’re packed. After enduring a long, Covid winter without leaving the city, we’re eager to be gone.
Last year, it was that Mexican beer virus that upset our well-crafted camping plans. This spring, it’s the weather gods who are throwing us a curve.
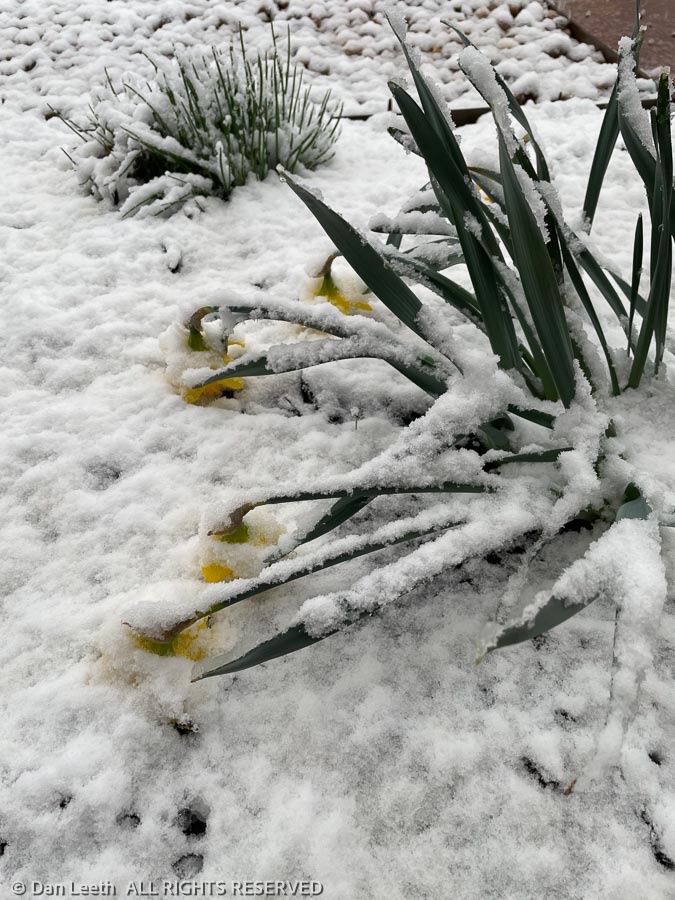
Prognosticators are predicting high temperatures barely above freezing with 17-degree lows for the first few days we’ll be gone. Plants will freeze unless covered, my wife insists, and with temperatures that low, we don’t dare activate the sprinklers.
There’s only one thing we can do. Panic.
Putting our heads together, my wife has come up with a plan. I will pull the trailer solo over the mountains on the one good weather day predicted. Dianne will stay home and keep the plants covered and happy.
When the weather finally clears, I will drive 250 miles back to Denver, pick her up and return those same 250 miles back to camp.
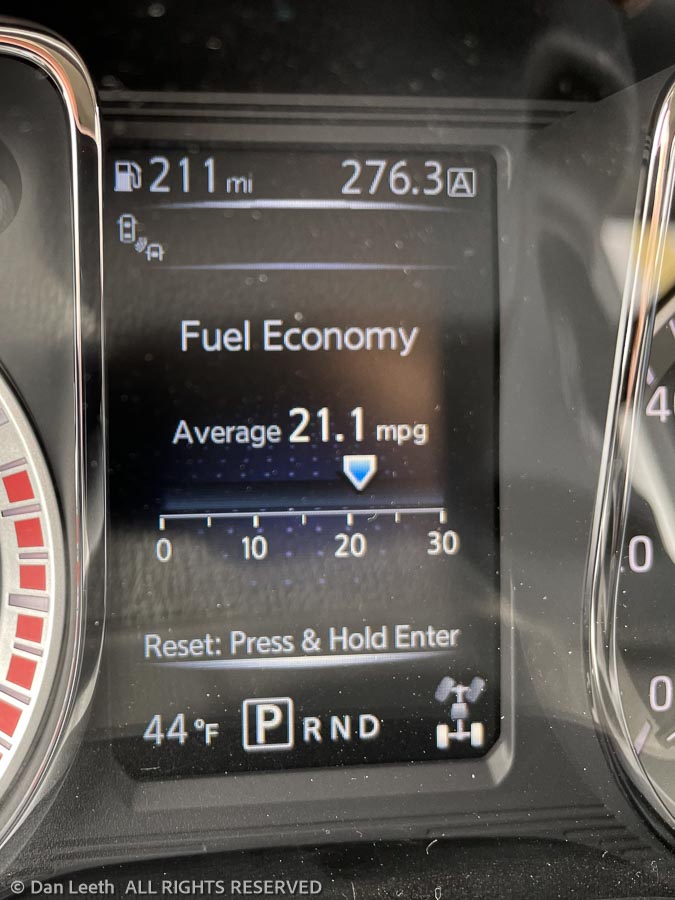
There is a bright side to this whole plan. When I pull the trailer, Tighty (our Nissan Titan pickup) gulps gas faster than an alcoholic guzzling the spiked punch at a wedding reception. I can reach 10 miles per gallon only when going downhill with a tailwind. Otherwise, it’s in the eights or nines.
Driving back empty, I’m looking forward to seeing what the fuel economy gauge looks like when displaying double digits.
“What happened?” my wife, Dianne, asked when she saw the photo. “Did you pull the trailer down a four-wheel-drive road?”
No, it was far worse than that. I was on Interstate 70.
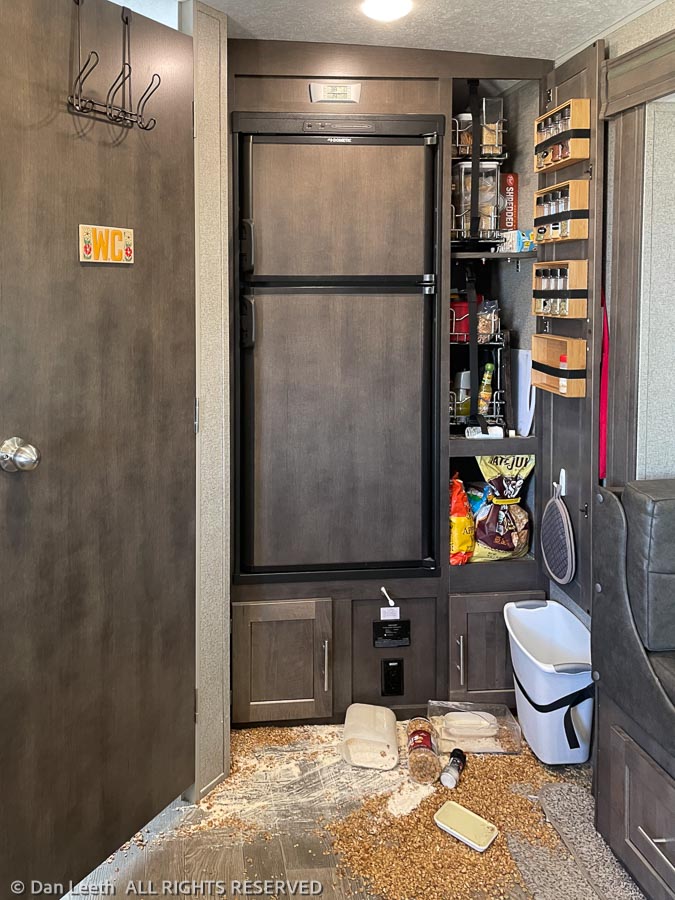
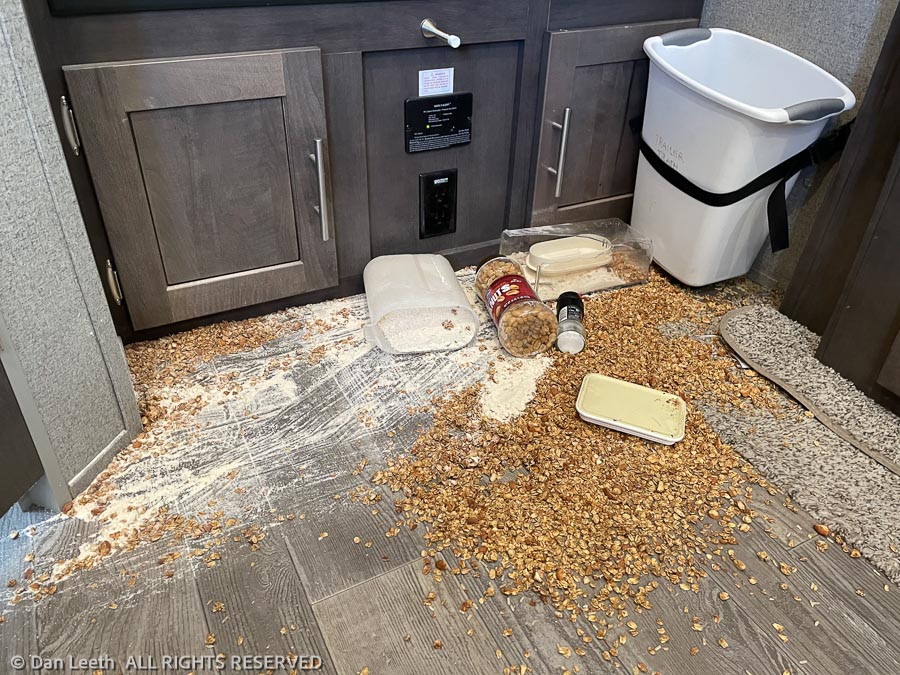
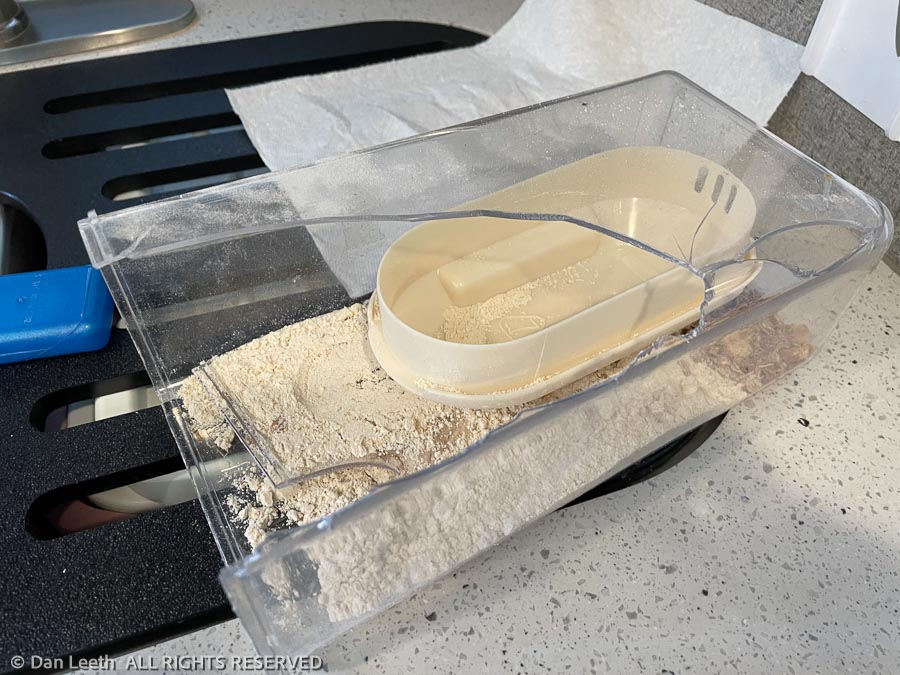
The potholes, cracks, frost heaves, bumps and sudden plunges in the pavement on Colorado’s main route across the Rockies agitated the contents of the trailer like a martini in a bartender’s cocktail shaker. When I opened the door, I was greeted with the remains of an Animal House food fight.
I don’t know if the food loading crew (Dianne) didn’t get the pantry door firmly latched or if it was just the weight of the innards pushing outward, but the door had flown open, and stuff came out.
All of Dianne’s homemade granola lay in a mound on the floor along with enough pancake mix to feed a Boy Scout troop for a month. Like the aftermath of a wedding party, rice lay scattered everywhere.
It took an hour to clean up the mess. Fortunately, the only thing broken was the plastic granola cannister.
No damage was done to the trailer. We can replace the lost ingredients at the store, and Dianne promises to make up more granola before she rejoins me on Thursday. In the meantime, I’ll head to the hardware store and buy a safety latch for the pantry door.
Unfortunately, until that granola arrives, I’ll have to refrain from playing my John Denver CD for breakfast.
Of course, it’s raining on our last full day in the canyon country around Grand Junction. The weather on this trip has been less than ideal.
We had planned to leave home a Saturday ago, but nixed that plan when a storm hit the Rockies. Pulling the trailer over/through a pair of 10,000-foot passes on snow-plastered roads just didn’t sound like an intelligent thing to do.
Then there was the home issue. Our budding plants needed to be covered to protect them from sub-freezing temperatures, and the sprinklers couldn’t be safely activated in such cold conditions. So, Dianne offered to stay home and protect the plants and plumbing while I took the trailer across the Rockies on Sunday.
One pair of friends also arrived on Sunday. Monday morning was dead calm, and they put up the awning on their Airstream trailer. We then walked into town to get a latch for our trailer’s pantry door. While we were there, we hit a neighborhood brew pub for burgers and brews. By the time we returned the wind was howling. Fortunately, it only took a few hours to unbend the bars and retract the remains of his awning. A replacement will be on order when he returns home.
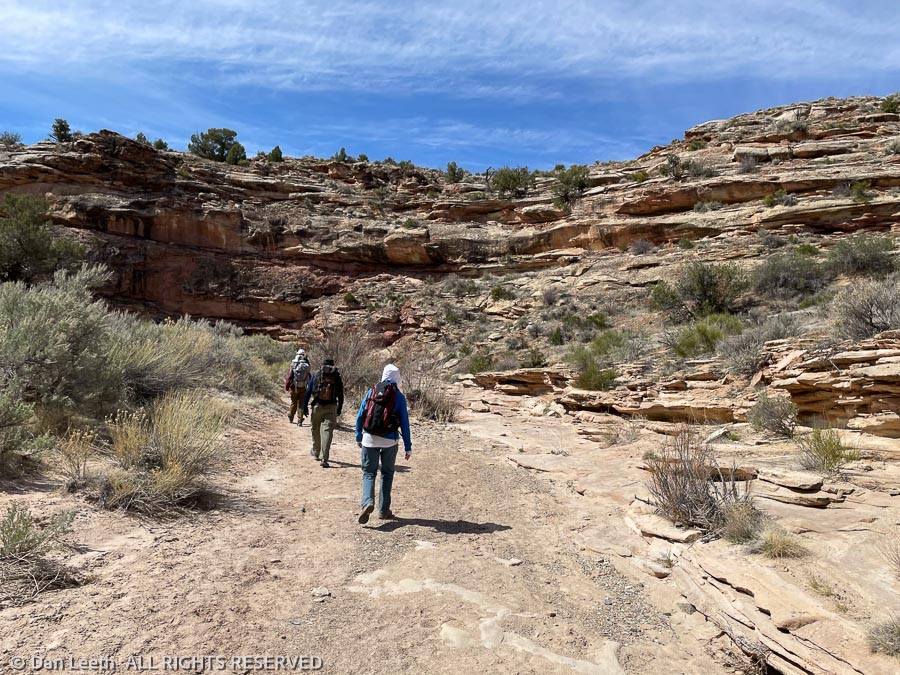
Another pair of friends arrived on Monday. Hiking began on Tuesday with a short trek down a canyon in the McInnis Canyons National Conservation Area. We hiked another set of trails in the McInnis Canyons on Wednesday.
It was time to eat something besides microwave popcorn and wine for dinners, so on Thursday, I drove back to the Denver area to fetch my cooking staff. It’s a bit over 250 miles from our campsite in Fruita to home and another 250 back. Indy car racers go 500 miles and think nothing of it. My friends, however, were absolutely impressed that any human being could possibly drive that far in one whole day. I was impressed that without the trailer in tow, I actually got better than 20 mph in the truck.
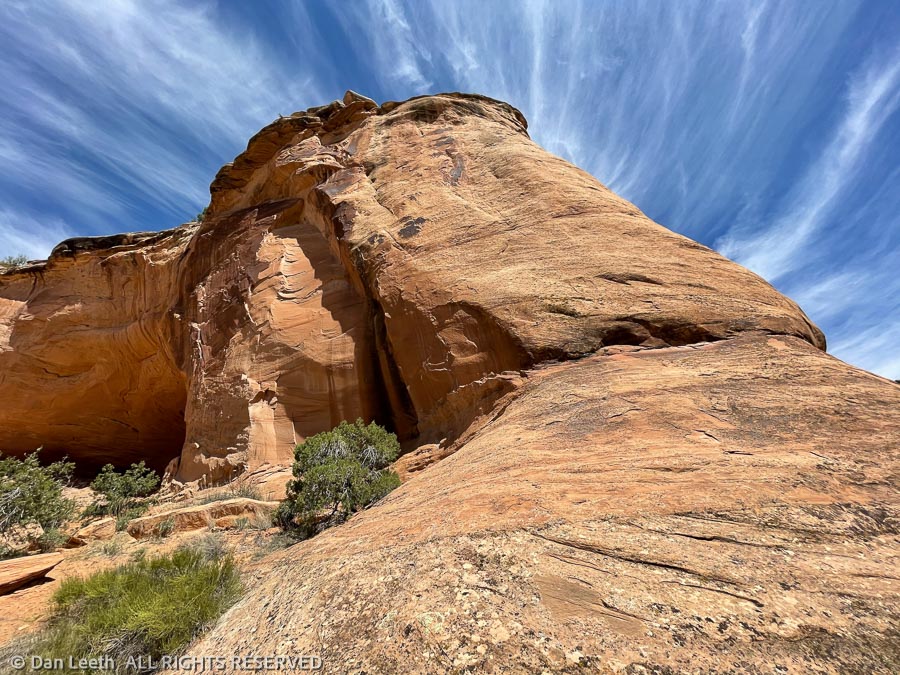
Over the next four days, we did more hikes, both in the McInnis Canyons area and in Colorado National Monument. The skies remained dry, but we frequently had to deal with bothersome winds. The joy of being surrounded by sandstone cliffs and canyons made up for the fear of being blown to Oz.
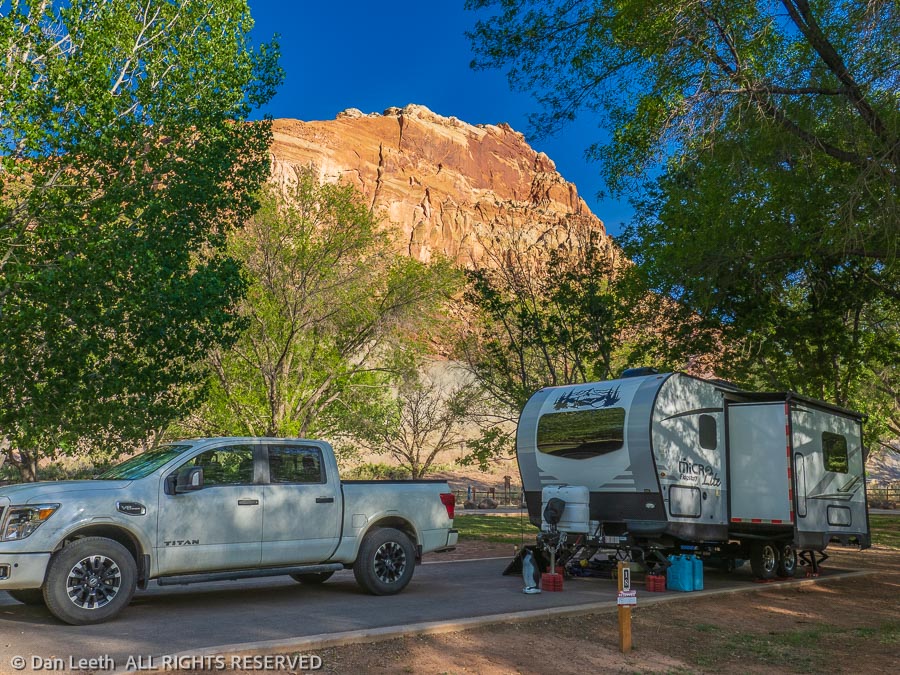
Tomorrow we hook up the trailer and head for Capitol Reef National Park in Utah. Hopefully, the winds calm on the way there. There is one certainty in our future. We won’t be seeing 20+ mpg again in the truck.
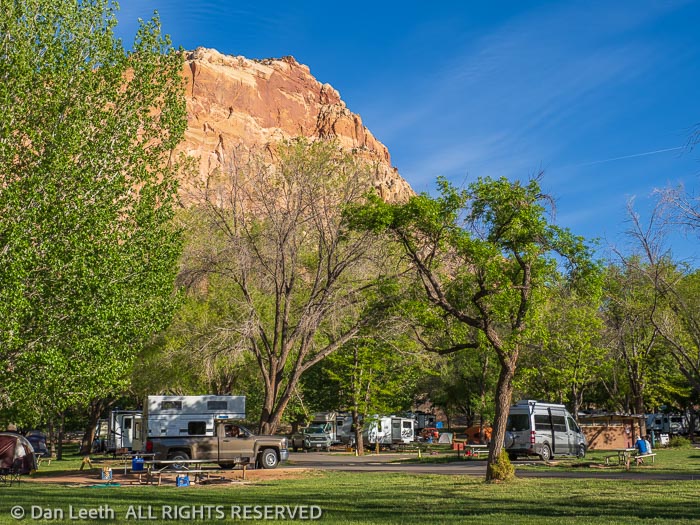
Capitol Reef National Park is a bit of a rarity. It’s a popular park that still allows one to camp for 14 consecutive days. That’s exactly what we did.
Getting a camping reservation, however, was a bit of a challenge. When sites became available exactly six months ahead of our chosen date, our first-choice site was not available. Instead, we got an end site directly across from the dump station.
A large open lawn giving us plenty of sun for the solar panels and a direct line of sight to the dump station provided hours of people-watching entertainment. Yes, there are a lot of newbies out there who don’t yet know what they’re doing.
Our friends who joined us at Robb State Park in Fruita, Colorado, joined us for various lengths of time at Capitol Reef. That meant lots of hiking.
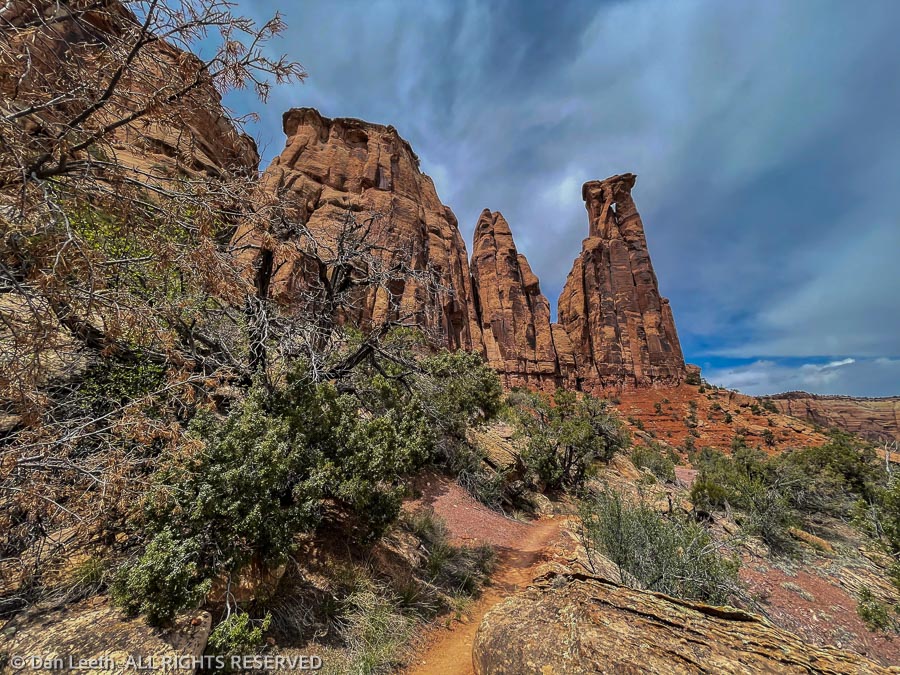
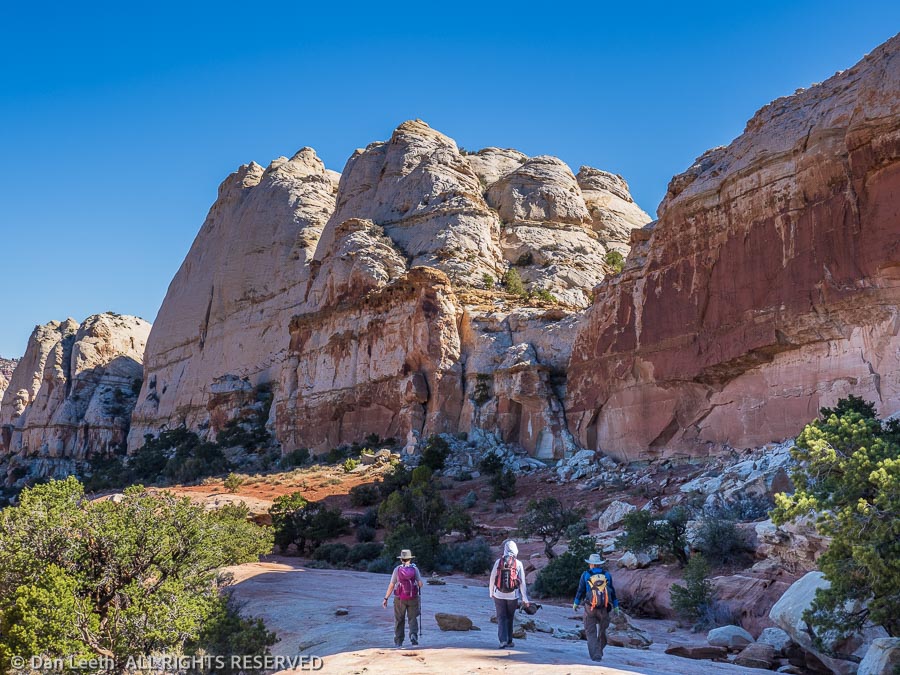
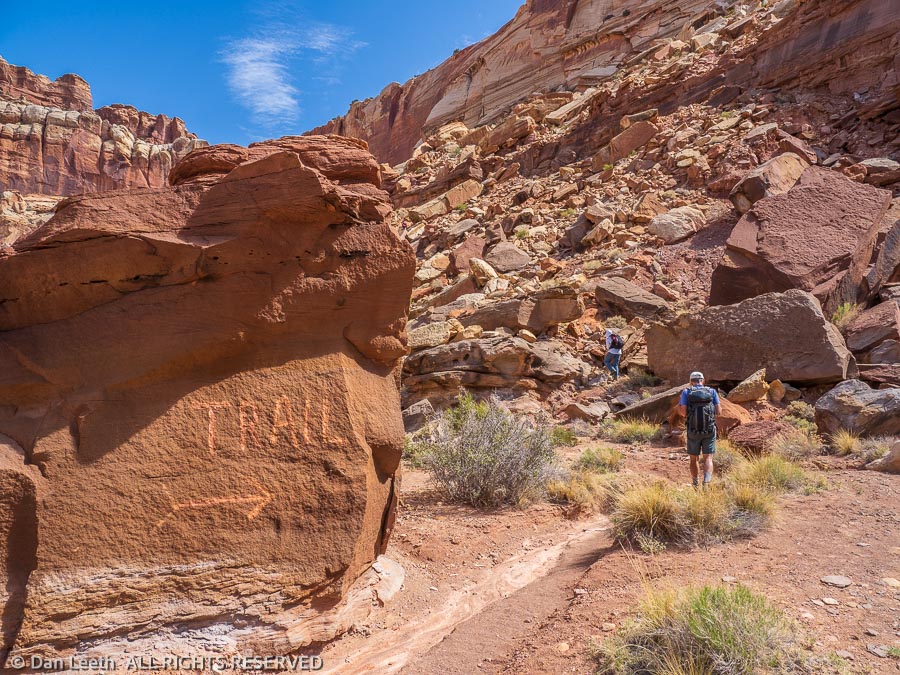
The first day, we did a 10-mile hike to the Navajo Knobs. The trail shares a trailhead with the route to Hickman Natural Bridge, one of the most popular hikes in the park. Much against the wishes of one member of our group, we made a 7:30 a.m. departure. We arrived to discover the trailhead parking lot was already a quarter filled. It would be overflowing in an hour.
We avoided any parking problem on our second day by hiking the Cohab Trail which starts directly across from the campground. Four of us just did an out-and-back hike to where the trail ends at the highway into the park. The other four broke off onto the Frying Pan Trail and continued to Cassidy Arch and down into Grand Wash. Providing Uber-service, I drove around to their take-out point that afternoon and gave them a ride back to camp. They didn’t tip.
Our third day was spent doing plumbing repairs. A pipe from the water pump began leaking, so Dianne and I drove 28 miles to the nearest hardware store in Loa for parts. Back at the trailer, I loosened my pants to show lots of plumber’s butt and repaired the problem. That night we celebrated one member of our group’s birthday at the Broken Spur Restaurant in Torrey.
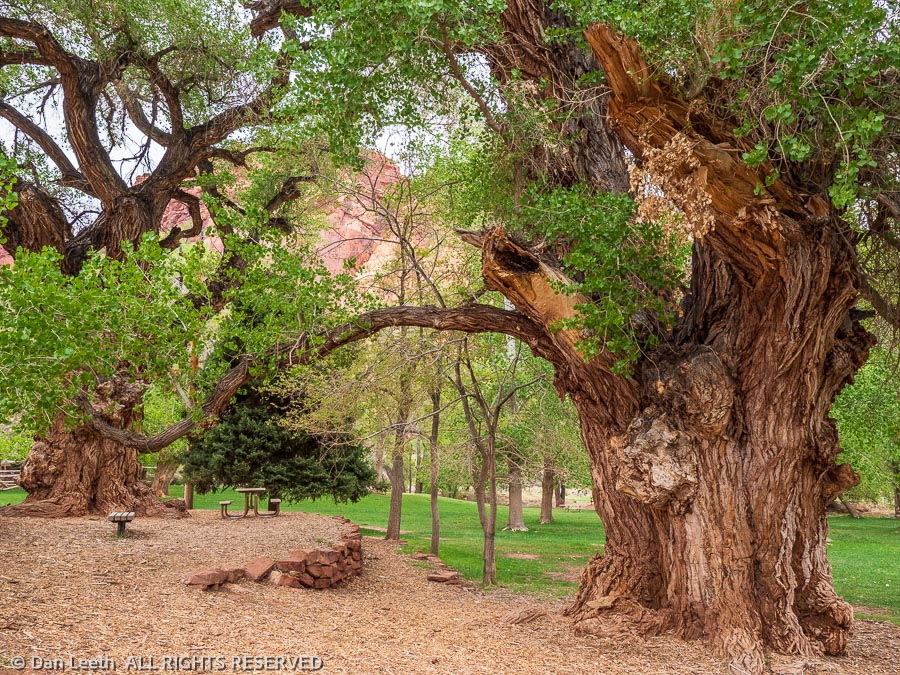
Lousy weather made the next day a rest day with only a three-mile walk to the park’s visitor center. An information volunteer there gave us details about one of our proposed hikes, Sulphur Creek. With an unavoidable plunge pool on the route that required swimming across, we struck that hike off the list. Back at camp, we walked over to photograph some giant Fremont cottonwood trunks in the soft, overcast light. No image can capture the magnificence of these historic trees.
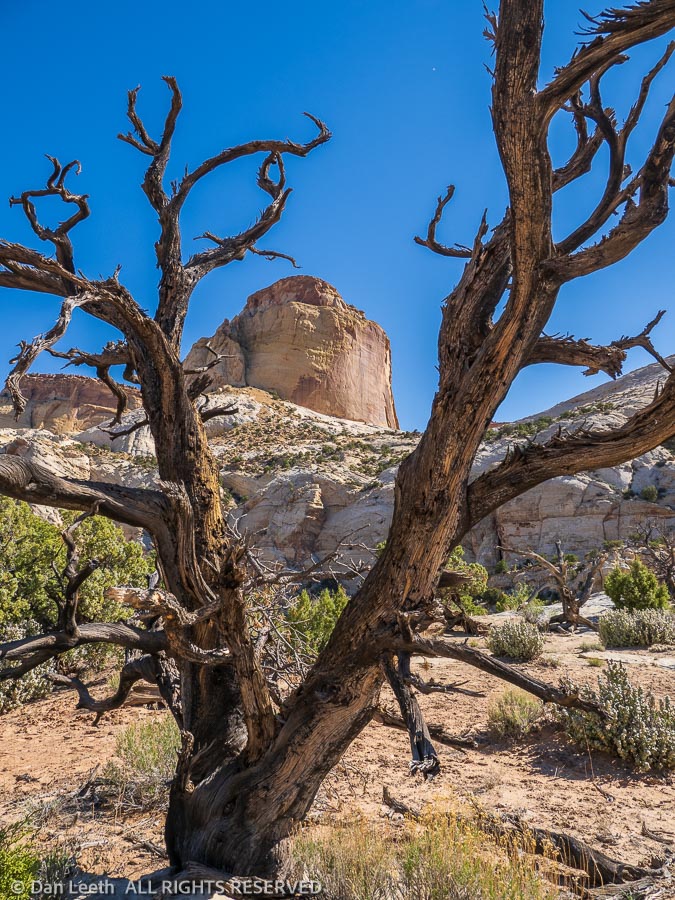
The next hike was on an abandoned trail behind a formation known as the Castle. Requiring a lot of trail finding over fallen rock, it was easy to see why the park chose to cease maintaining the route. We only saw four other people on the trail, the fewest we had yet encountered.
I’ve been to Capitol Reef perhaps a dozen times or more over the years. This was the most crowded I’ve ever seen. Dianne met a guy in line for pies at the Gifford House who worked for the Forest Service. He told her that nationwide, there are 7½ million new campers out this year. Many of them, no doubt, were at the park.
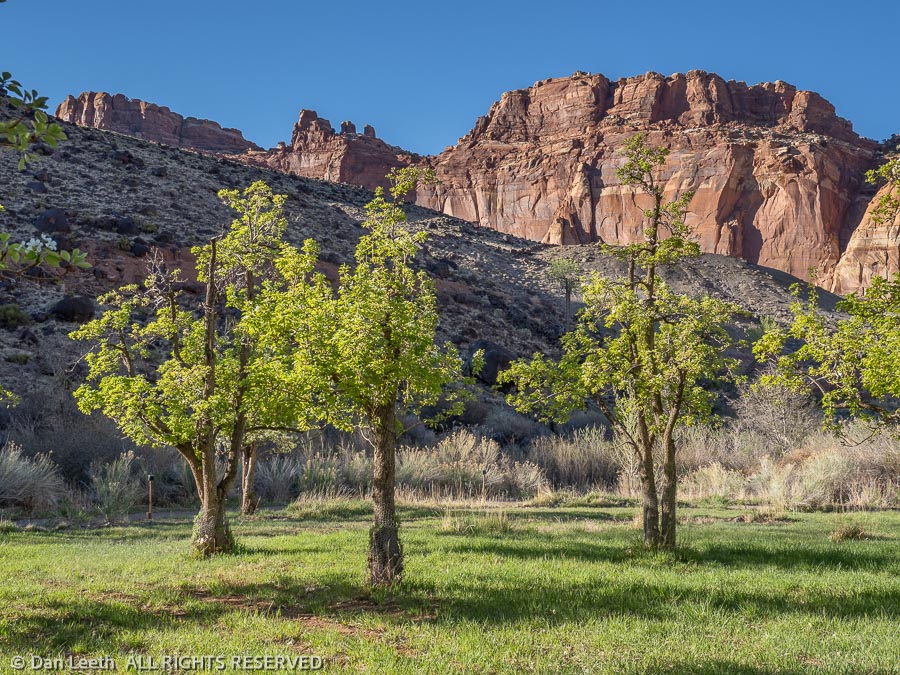
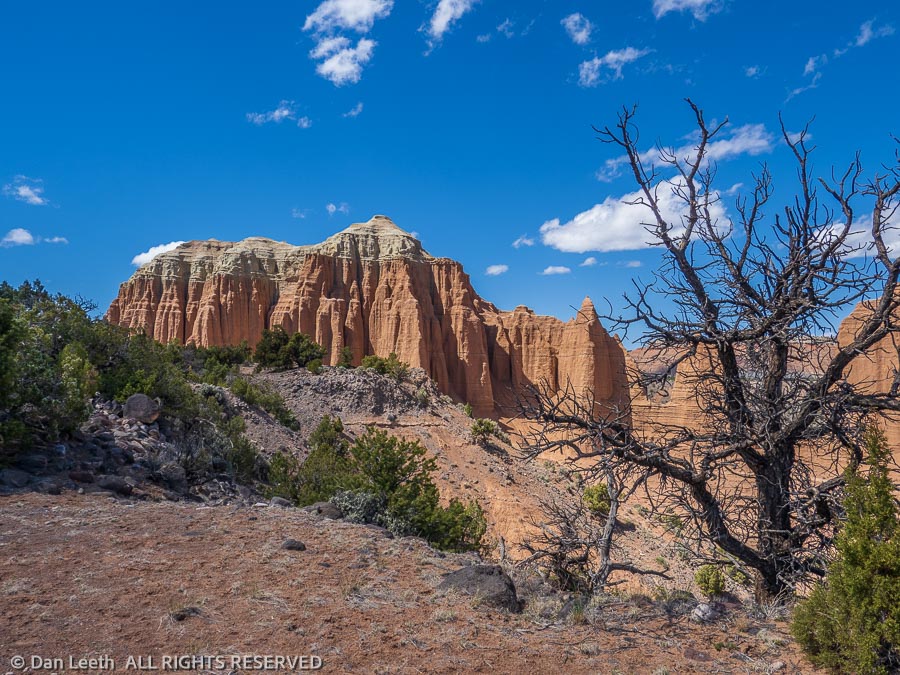
Capitol Reef National Park has three distinct sections. The main one, the one that those 7½ million new campers are heading for, is the historic Fruita section. This is where the historic buildings, orchards, main campground and scenic drives are located.
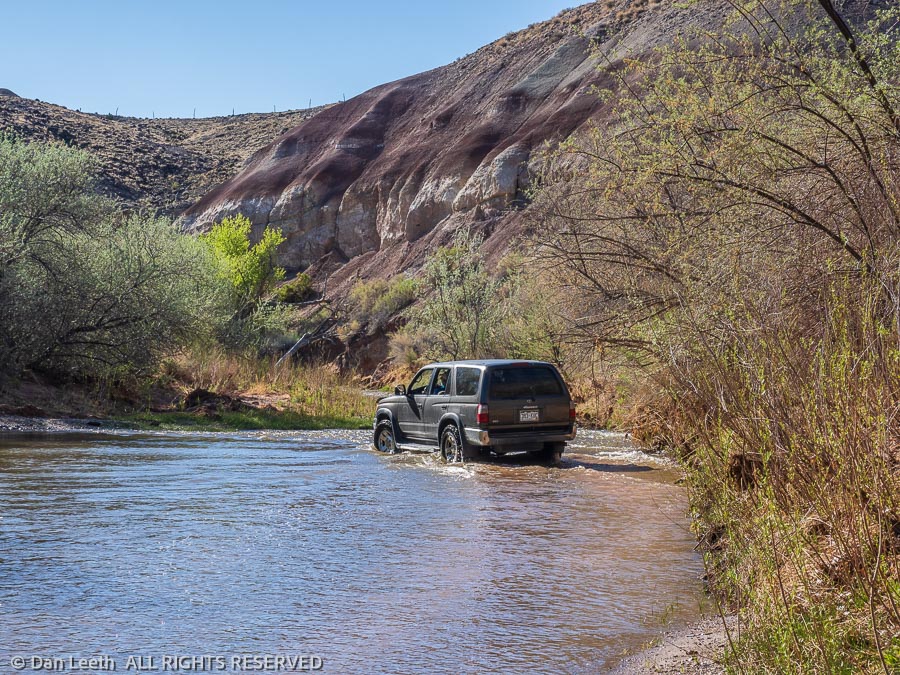
To the north lies the Cathedral Valley section, which one member of our group wanted to see, and another was willing to visit as long as he didn’t have to drive his own truck there. They all piled into one vehicle with Dianne and me following in ours.
The Cathedral Valley road is graded gravel, rough in spots and highly washboarded otherwise. The loop route begins by fording the Fremont River, which was about hub-deep on our vehicles. This is not a route for grandma’s Buick.
We did the loop route with several short hikes to viewpoints along the way. When we got back to camp, we discovered that the tonneau cover on our pickup bed had slid off to one side. The next morning, I got to take everything out of the bed and make repairs. We followed that with a short hike up the Fremont River Trail in the afternoon.
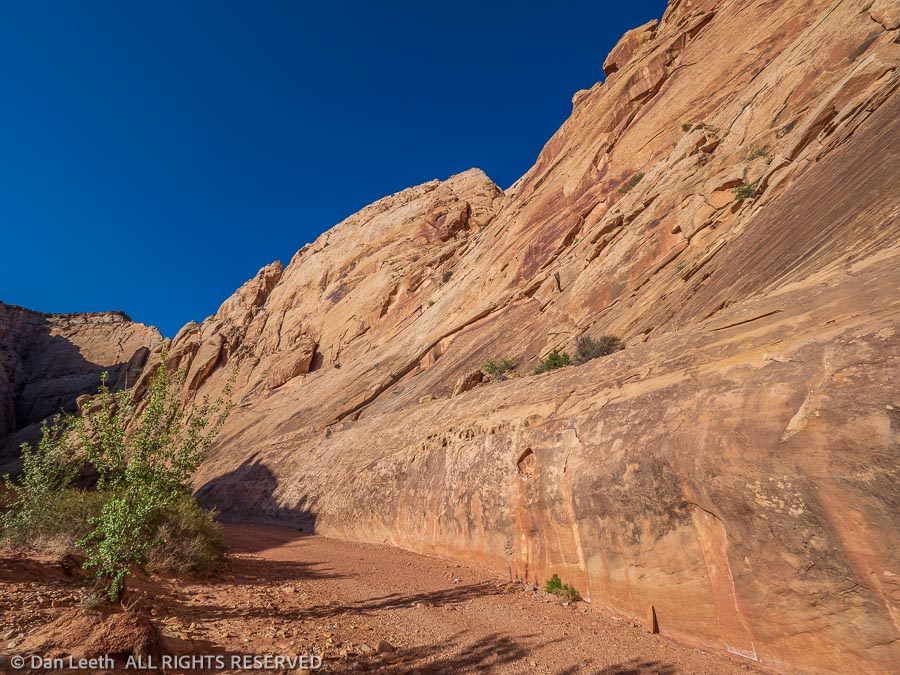
Our last hike with friends was to the base of the Golden Throne formation followed by a walk down Capitol Gorge to the park boundary. Along the way, we passed the Pioneer Register, a sandstone wall covered with historic Mormon graffiti, and a side canyon filled with the potholes that earned the geologic uplift it’s Waterpocket Fold moniker.
With our friends heading for home, Dianne and I did what we had been longing to do. We took a day off and did nothing. And we did it well.
There are three immensely popular hikes in Capitol Reef – Hickman Bridge (which we did on our last visit), Capitol Gorge to the graffiti wall and Grand Wash.
To make sure we got our full dose of humanity, the next day we hiked Grand Wash. We did it from the bottom up, beginning where it ends at the state highway. With an early start, we largely had the canyon to ourselves. That ended as we approached the upper end.
Now, don’t get me wrong. I like people. I’ve hung around them all my life. I even married one. I should be glad to see hundreds and hundreds of people enjoying our national park gems. Hopefully, they will be inspired enough to support the efforts being made to protect more of our public lands.
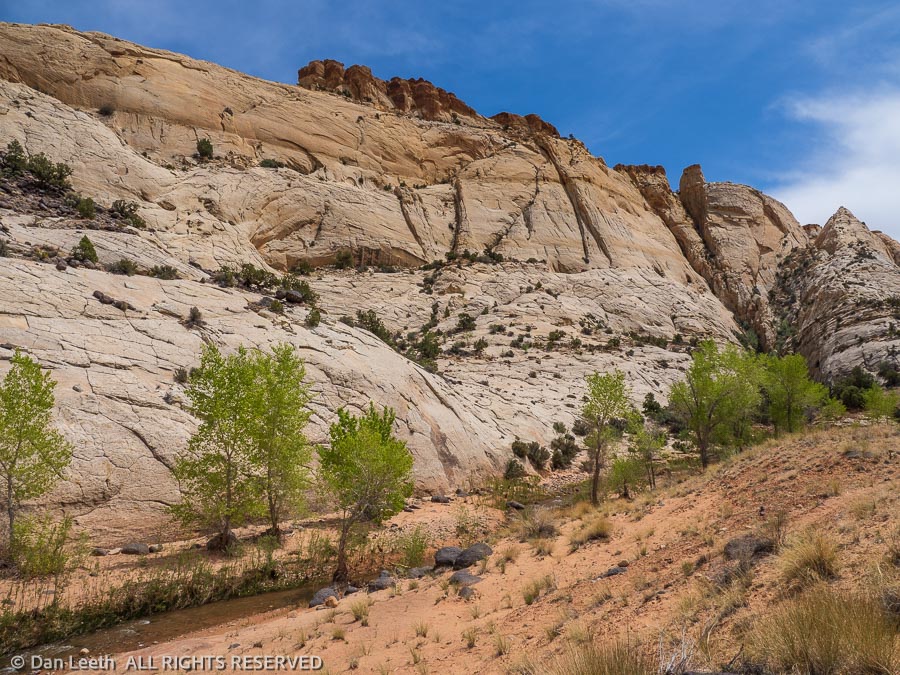
But there are times when Dianne and I just want to get out and enjoy the landscape on our own. We want to listen to wind rustling tree leaves, not country-western tunes from a hiker’s boombox. We had that opportunity with a hike down Pleasant Creek.
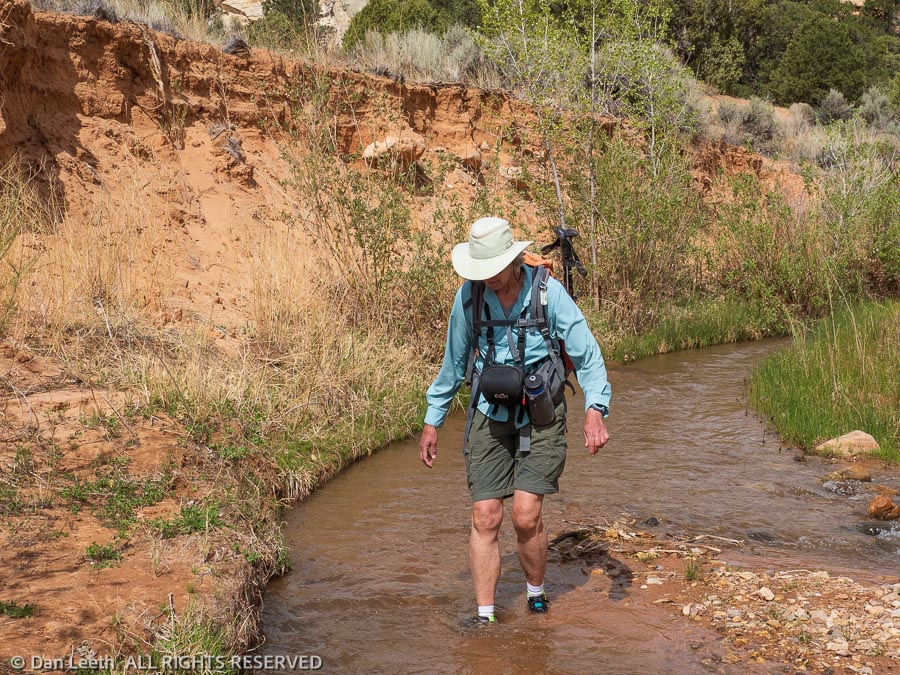
There’s no trail down Pleasant Creek. There are simply hikers’ routes through a wide canyon with a permanent stream. Cliffs by water’s edge make crossing the creek a necessity. Later in the season, it may be possible to rock-hop across in places. With the spring runoff still coming down, we had to wade through ankle-deep water 21 times each way. We hiked in tennies for just that purpose.
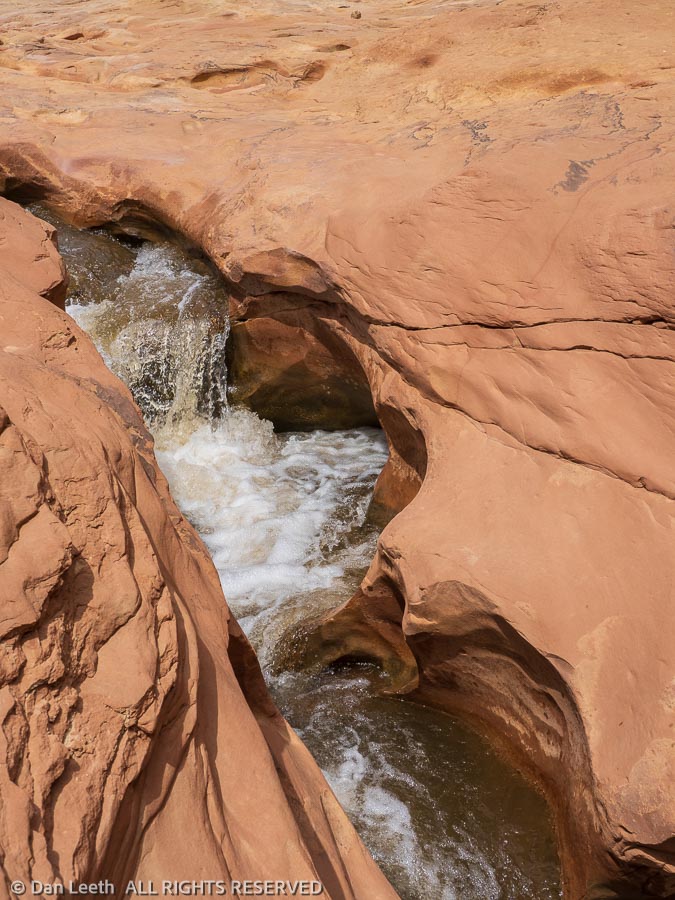
Covering 9¼ miles, out and back from the trailhead to the park boundary, we saw absolutely no one. In one place we passed a chute where the creek formed a Jacuzzi tub in the sandstone. If it had been a warmer day, it would have made a great skinny-dipping hole.
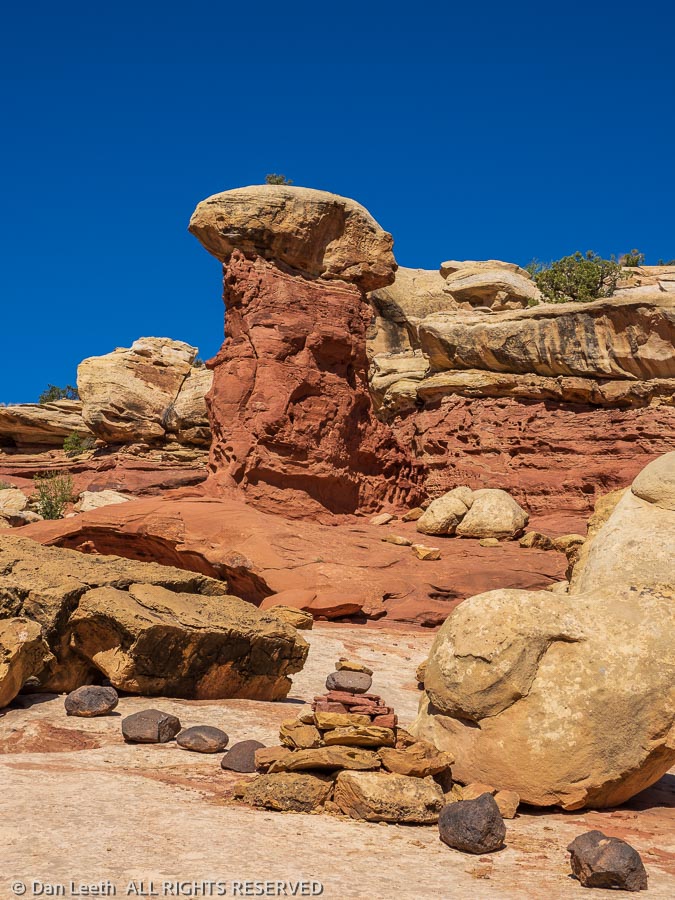
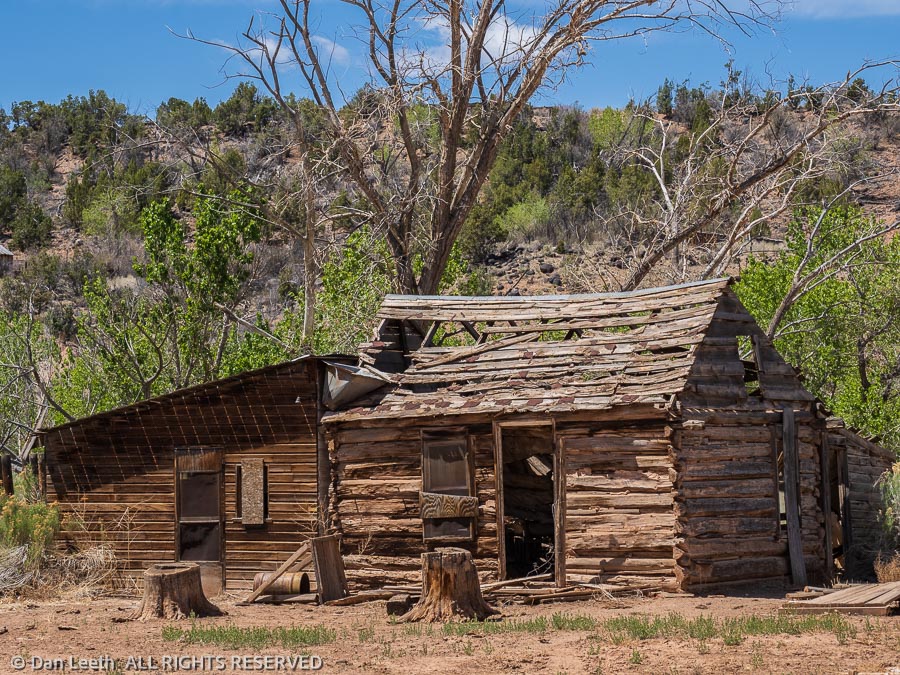
After a day spent grocery shopping in Loa and doing laundry in Torrey, we spent our final Capitol Reef day driving the Notom-Bullfrog road into the third portion of the park – the Waterpocket Fold section. We explored a few side roads where we photographed cliffs, hoodoos and abandoned cabins. We turned around at the park’s Cedar Mesa primitive campground.
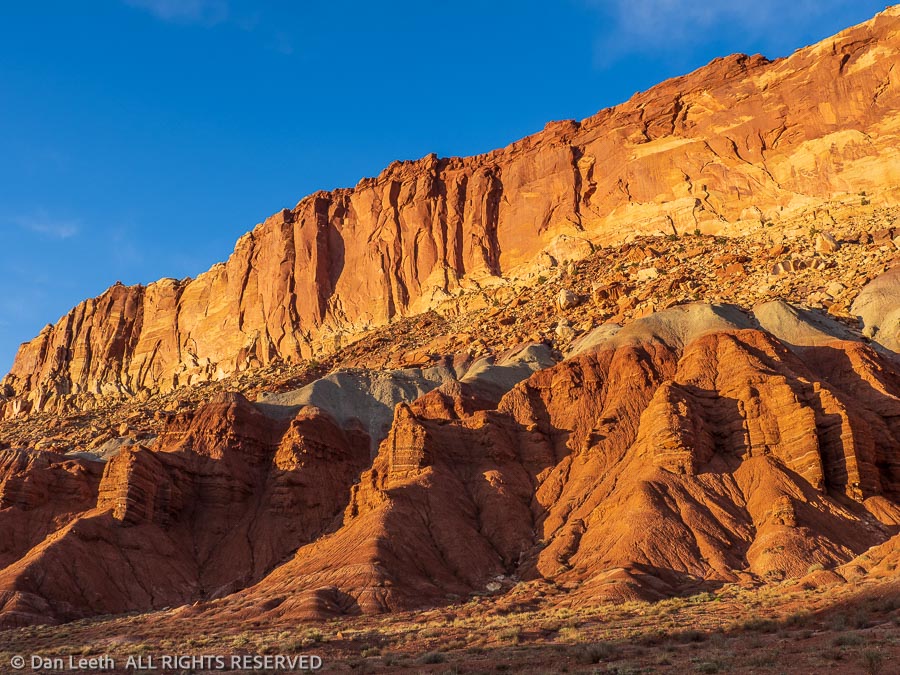
That evening, we drove down the park’s Scenic Drive, passing cliffs glowing in the light of the setting sun. Other than a few cars exiting the drive, we saw no one. It provided a glorious end to a two-week stay in my favorite Utah national park.
There aren’t many places in southern Utah canyon country I haven’t visited. I found one today.
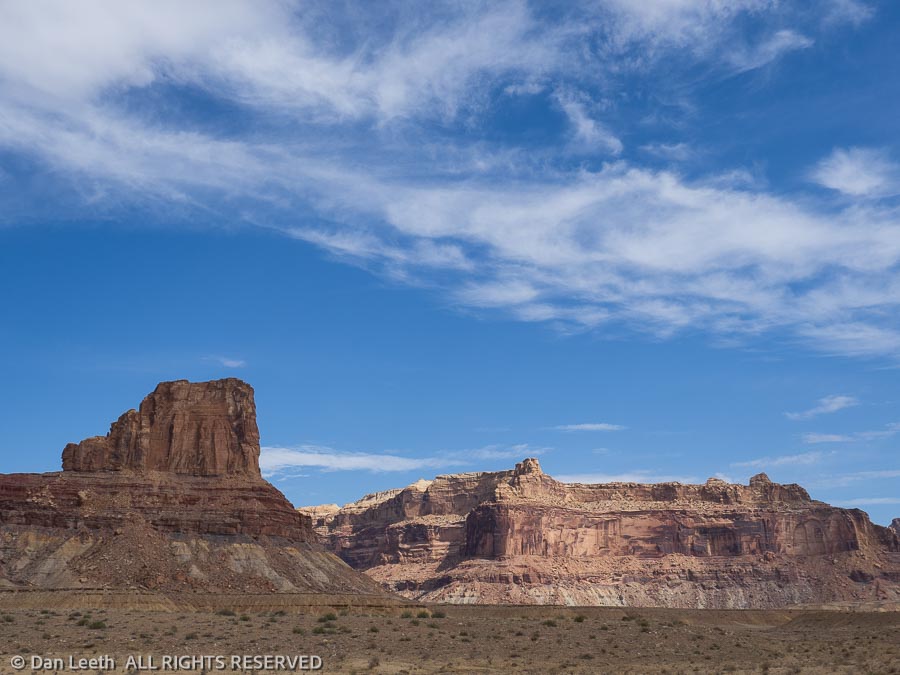
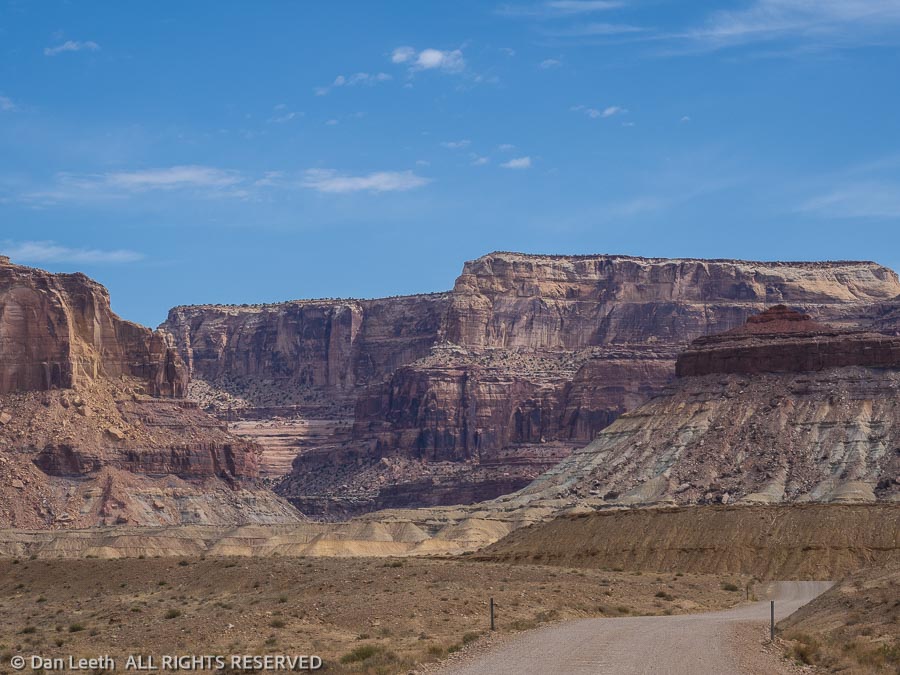
Years ago, I picked up a free booklet touting sights to see along the San Rafael Swell, a sandstone anticline west of Green River. We’ve cut across the Swell countless times on Interstate 70, stopping at numerous viewpoints to admire the terrain and the pit toilets. We were always on our way to somewhere else, so we never had time to get off the highway and explore what’s out there.
After leaving Capitol Reef, we had planned a three-night stop at Goblin Valley State Park. When no sites were available at Goblin, we booked a site at Green River State Park. We finally had an opportunity to visit the Swell.
Our chosen route was up a series of gravel roads that began at I-70’s exit 131. In the finest Utah tradition, the road surface was seriously washboarded. Fortunately, none of our tooth fillings fell out as we vibrated up the roadway.
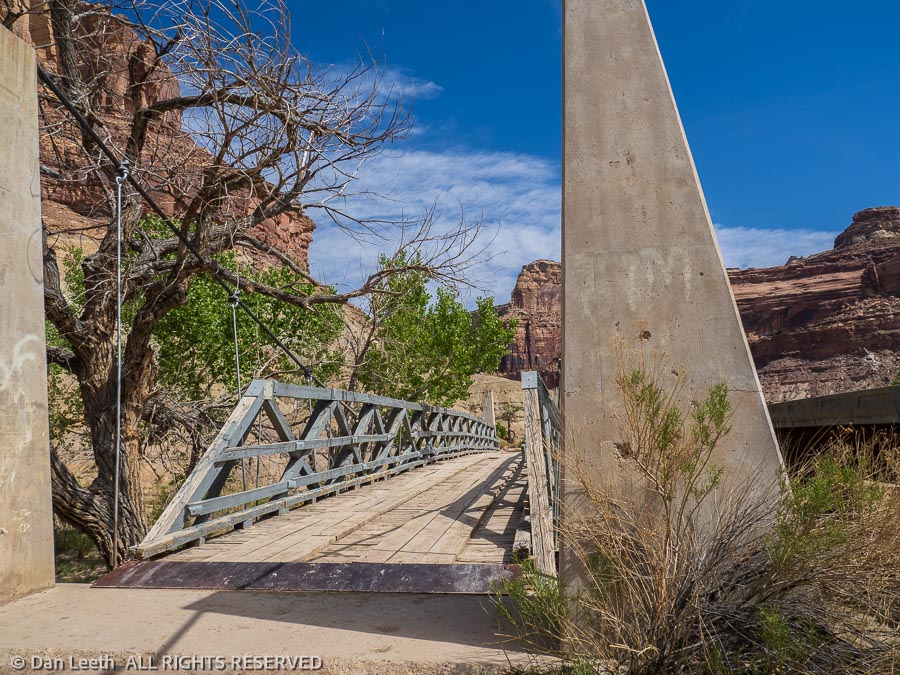
After numerous stops to ogle the scenery and water the plants, we reached the old “Swinging Bridge” across the San Rafael River. It may be a cable bridge, but it didn’t really swing. It’s closed to motor traffic now, but maybe it did back in the day.
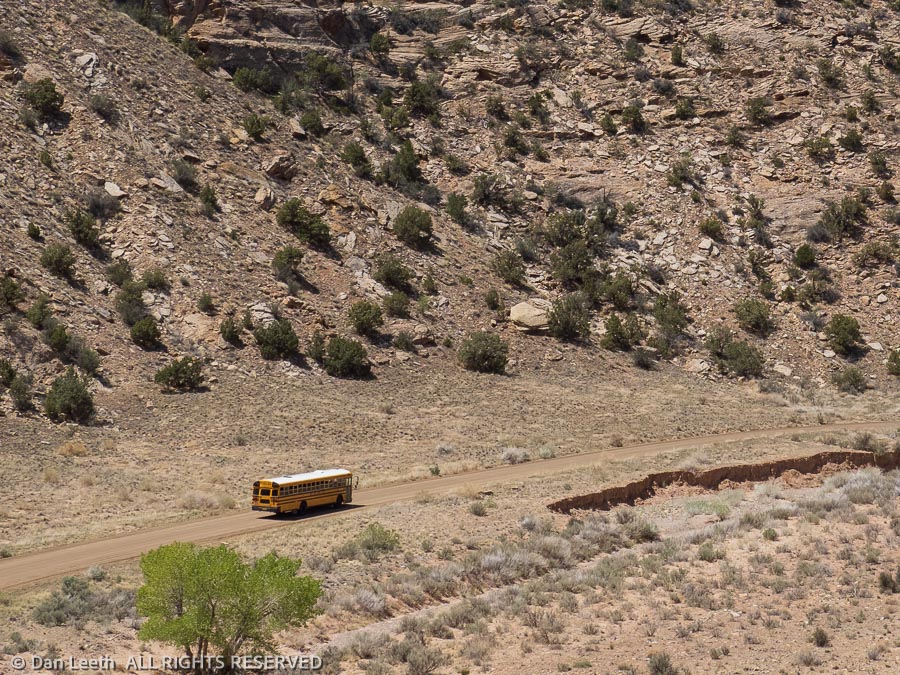
We would have enjoyed the bridge more, but the area soon became overrun by an infestation of third graders on a school field trip, each trying to out-shout his or her schoolmate. Adding to the din were a gaggle of teachers futilely shouting “don’t do that” commands to the kids.
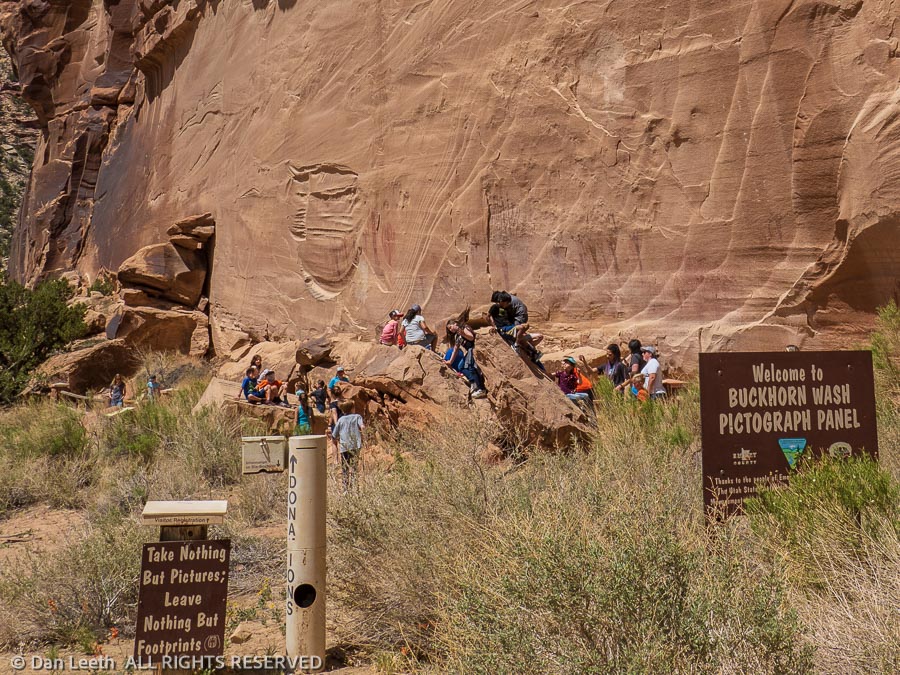
With the false assurance that they would be there most of the day, we took off to our next objective – the Buckhorn Pictograph panels. Here, members of the Barrier Canyon culture painted figures on the sandstone that have endured for perhaps a thousand years or more. I only wish Sherwin-Williams paint lasted that long.
As we examined the artwork, the unthinkable happened. We saw a large, yellow bus approaching. The school kids had arrived and were soon swarming over the site. With the promise from the bus driver that their next stop would be nowhere near ours, we evacuated the area and fled up the road.
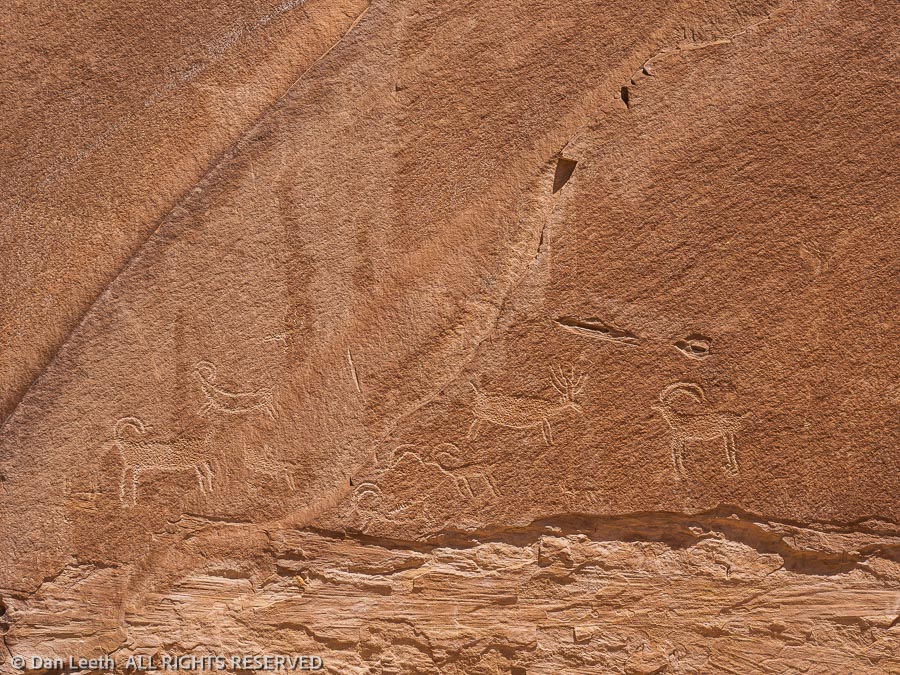
A small, BLM (Bureau of Land Management, not Black Lives Matter) sign beside the road alerted us to another rock art site – this one largely consisting of petroglyph figures pecked into the rock.
As we examined the site, I saw the bus pass us on the road below. Thankfully, they didn’t stop.
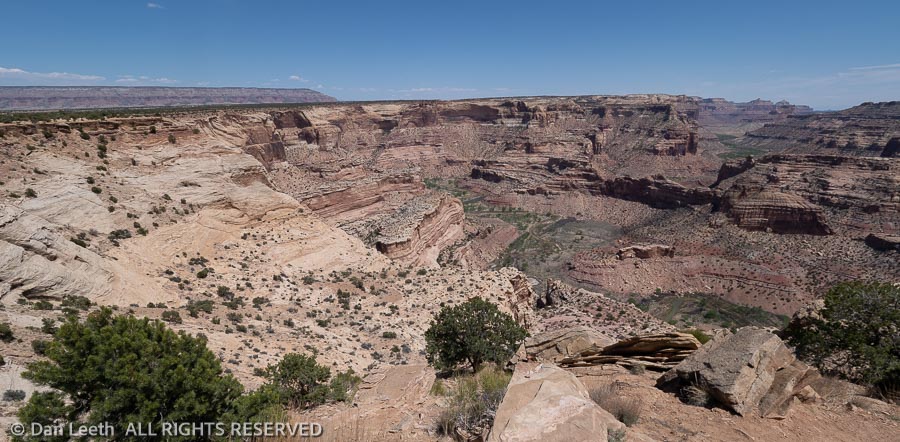
Our next stop was the Wedge Overlook. Here, the San Rafael River cuts through the uplift forming a deep canyon that local folks like to call the Little Grand Canyon. We ate our lunch atop the canyon rim, wishing we had something better than midday light to photograph the grandeur spread below.
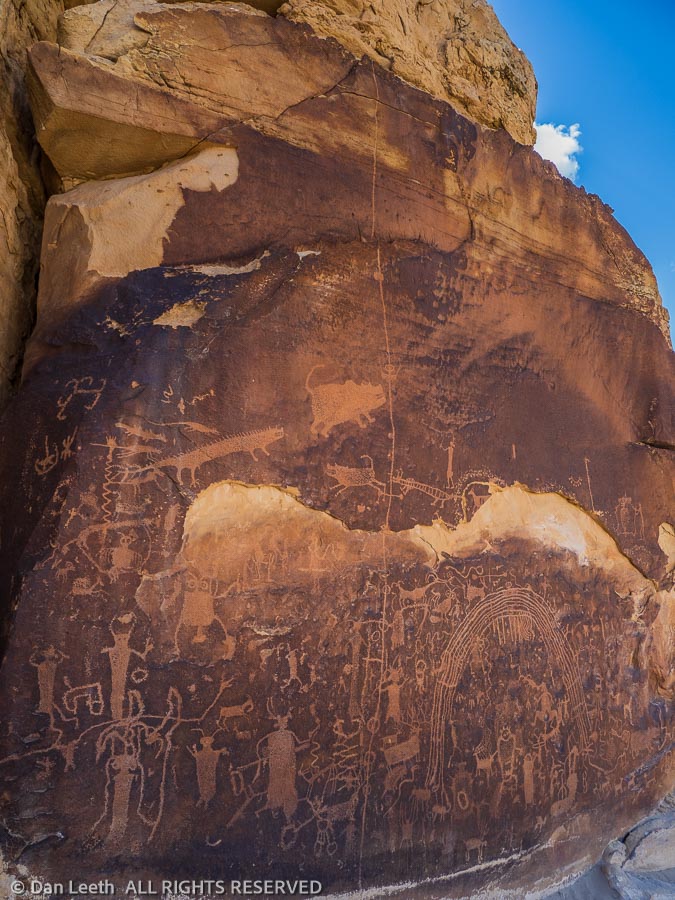
Reaching Utah Highway 10, we made drive-through examinations of Huntington and Millsite State Park campgrounds. We then turned toward our final planned stop – the Rochester Creek petroglyph panel.
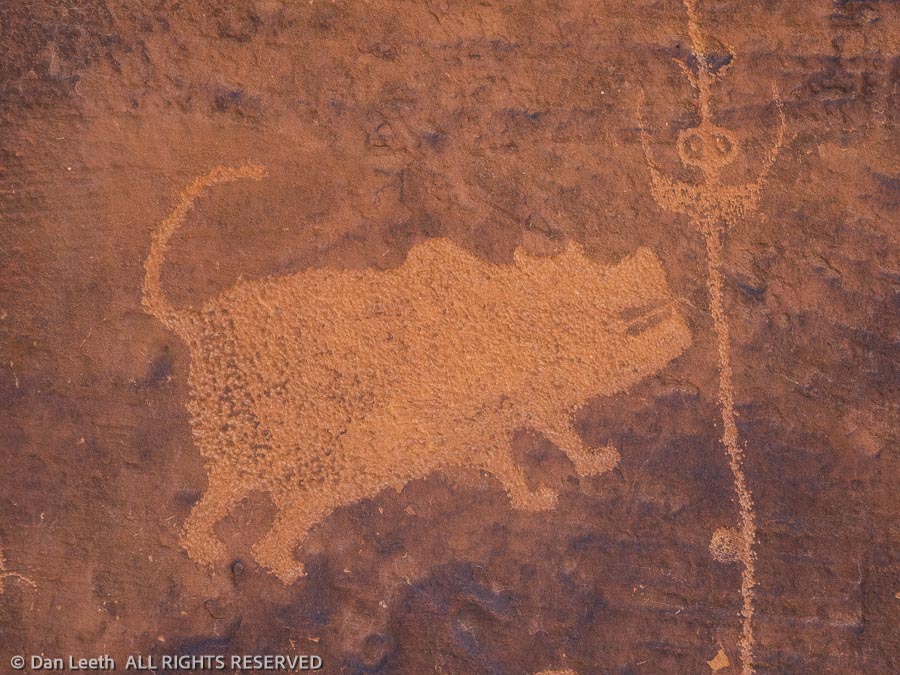
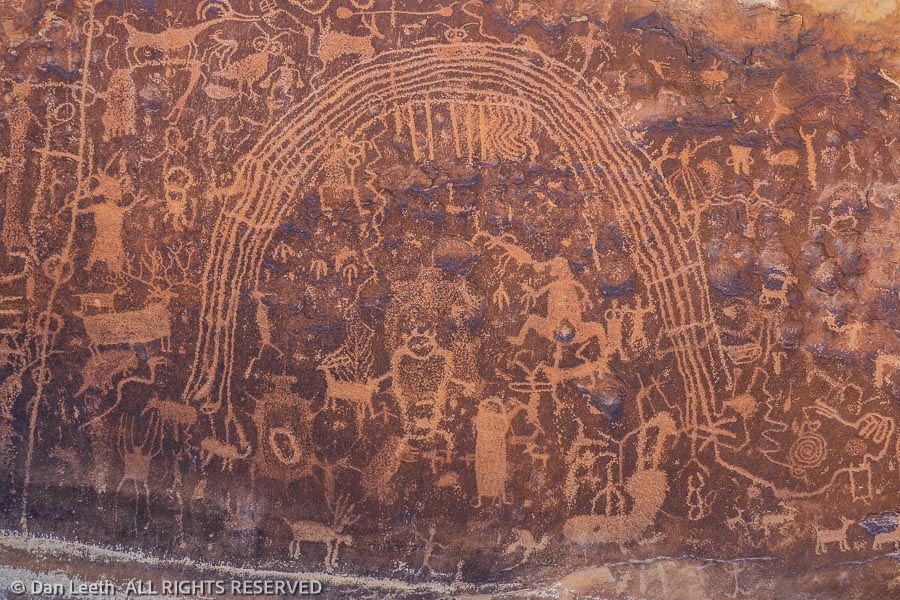
Over the years, I’ve seen hundreds of petroglyph sites where prehistoric peoples have pecked figures into the rock. I have never seen anything like this.
There were the usual drawings of hunters after bighorn prey. There were depictions of identifiable animals and some that could have come straight from a horror film. There were the commonly seen figures that X-File folks might say depict extraterrestrial visitors from another world. Arcing over many of the pecked drawings were a set of curving lines that could have easily represented a rainbow.
With the exception of what looked like a couple of bullet holes along with the names and initials of a few vandals from decades ago, the site was largely unmolested.
We returned to the interstate to make the 70-mile drive back to Green River. From here to “home” it was all familiar territory. Stopping at Ray’s Tavern in downtown Green River, we ended the day with burgers and brews. No third graders in here.